The MiniRex Project
This project was something I had wanted to do for many years but didn’t think it was possible given the power to weight ratio and VicRoads requirements. Well, I decided to ask the engineer anyway thinking there are so many V8’s in light cars so there must be a way. To my excitement he said yes it is possible. He gave me a few requirements to consider including that my mini needed to be a pre 1973 to get around quite a few of the ADR’s that I needed to meet with my 88 Rover mini. Hence I could not use this car and had to sell it if I wanted to fund this project. So I reckon it was mid May 2020 when I picked up the mini and started stripping the WRX. Within a few weeks my Rover VTEC Mini sold and the funds were put aside for this project. A fairly detailed spreadsheet was required to work out the outgoings and in goings for the project.
The project itself was to put the WRX engine into the mini behind the front seats as a mid-engined car with the 5 Spd gearbox towards the rear. This means it’s no longer an AWD and I will be using it as a RWD. (2WD)
As the rear floor was going to be cut out I was required to do a torsion and beaming test to see what the original mini base specs where to ensure I meet the engineers requirements once complete.
Months of research meant that I knew what I needed to buy for this project to be a success. I also splashed out on some feel good parts too.
- Mazda MX5 hubs, suspension and subframe. Why? Because it is a RWD vehicle and would suit my project. The MX5 has a 4x100 stud pattern so it wouldn’t look too different to the mini’s 4 stud. The problem I had was that it is very hard to find small wheels. Everyone wants larger wheels these days.
- 2003 BMW mini panoramic sunroof. I just love sunroofs so why not..... the video below shows that I bought one that works. Ha- 15” wheels. Of course I had to see what they would look like.
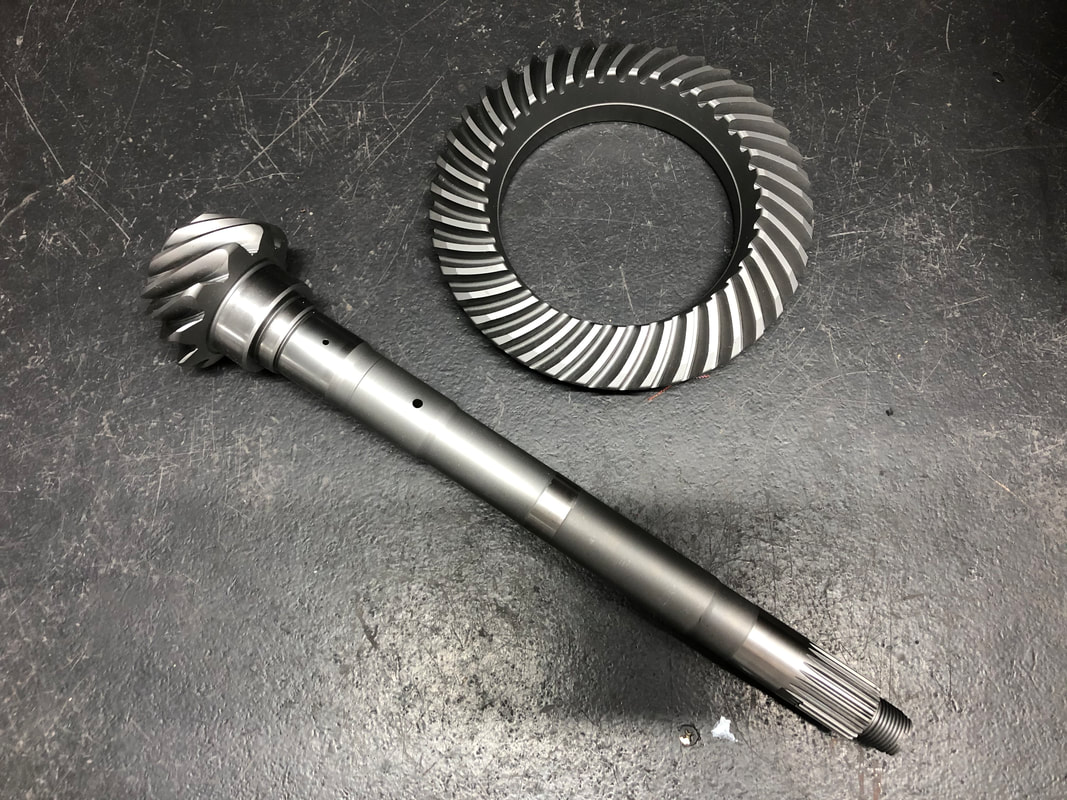
- A torque sensing Limited Slip Diff. (LSD) For some additional traction. I think I will need it. 😂
- 3.9 Final Drive (FD) to help get a similar gearing with the 15” wheels
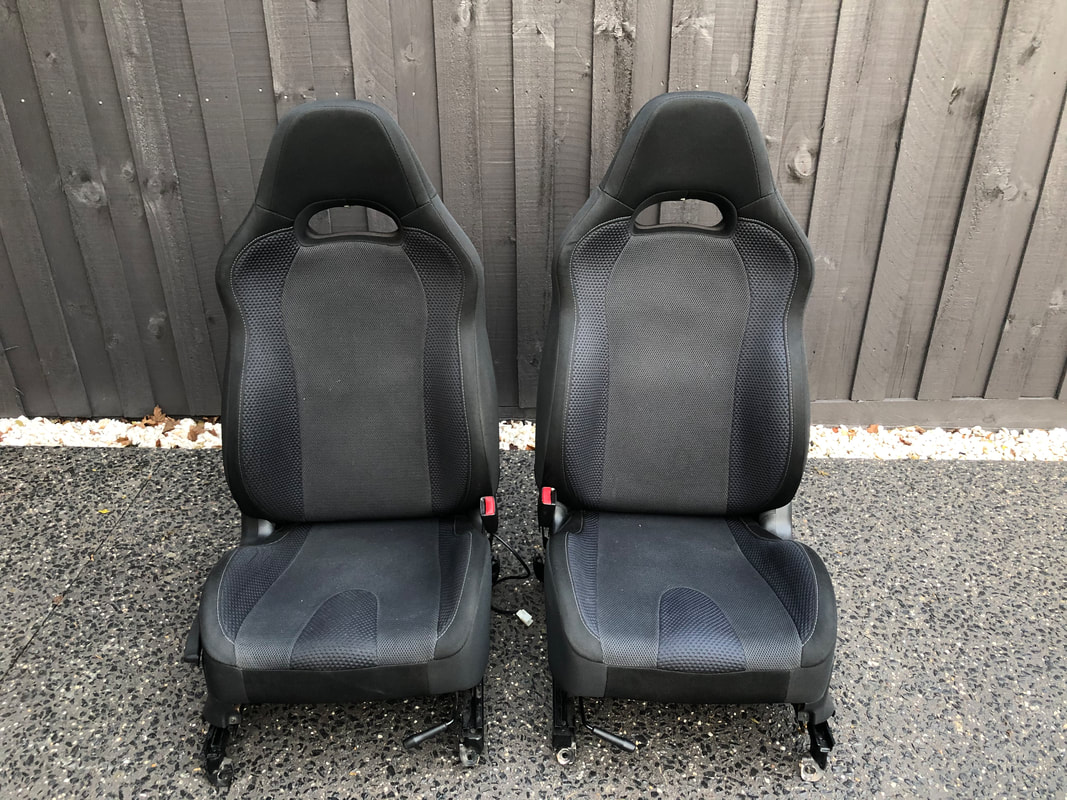
- WRX cloth seats. (2003) The WRX I bought had leather seats which I wasn’t a fan of.
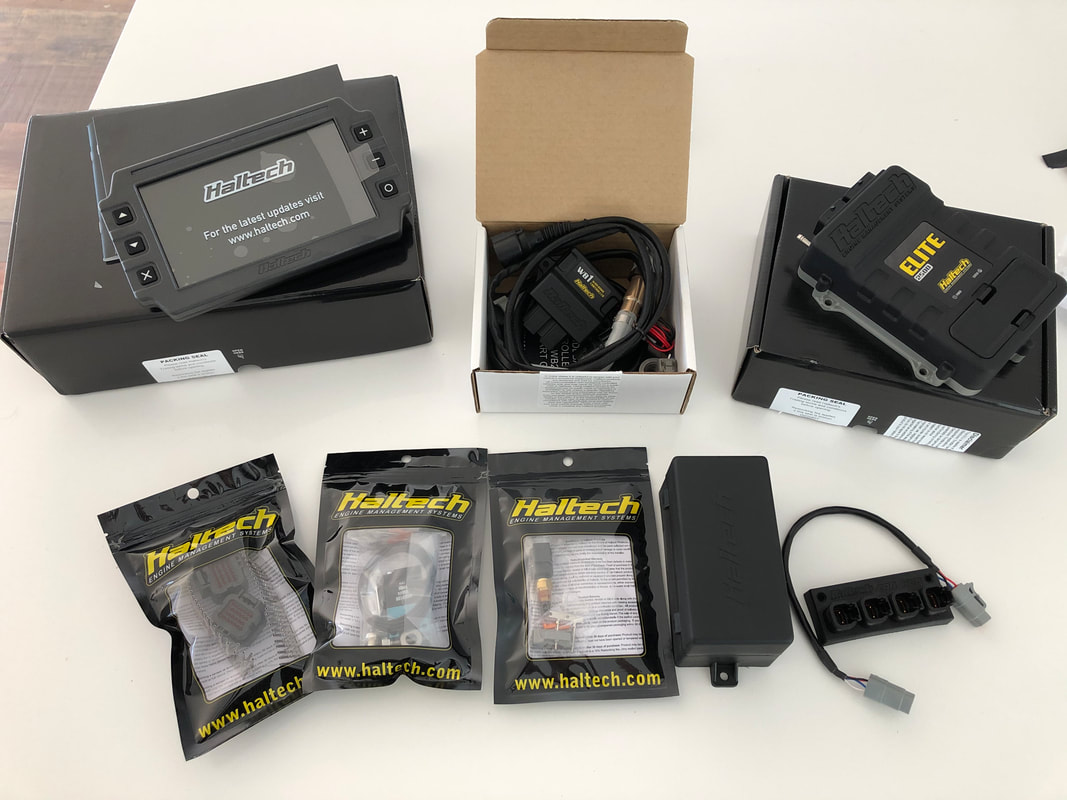
- Some Haltech goodies. Elite 2500 ECU, IC7 dash, wideband, pins, connectors etc
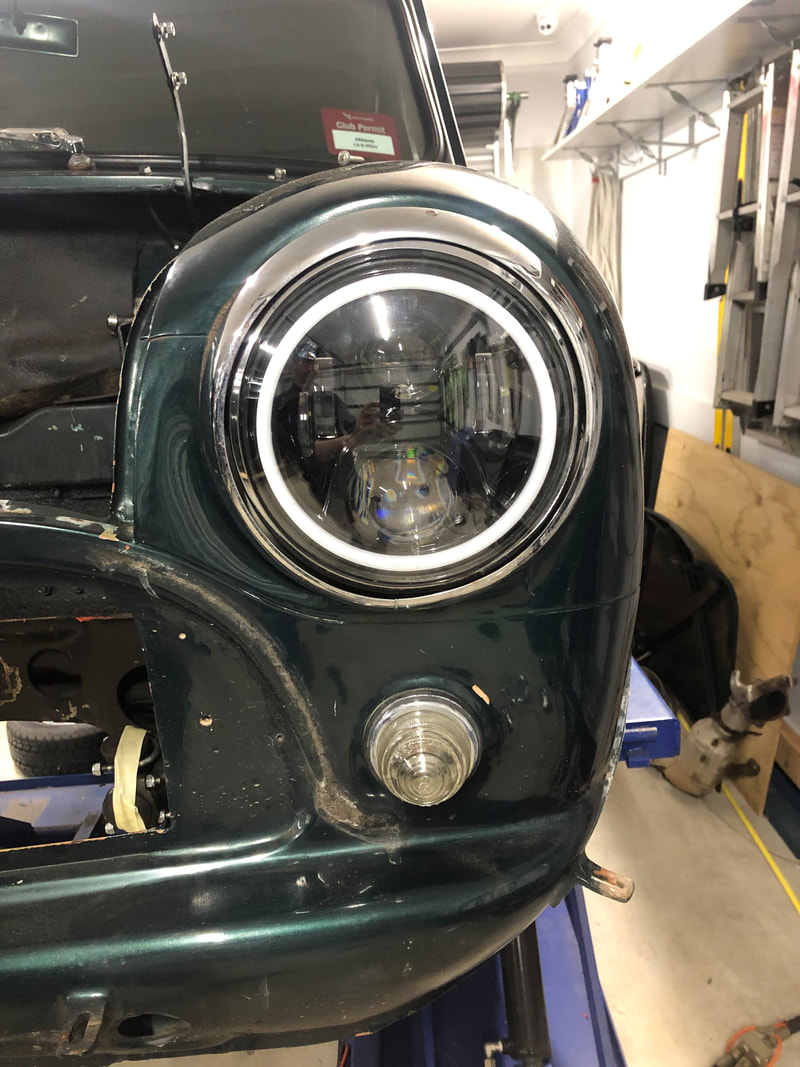
- A pair of LED headlights with halo ring.
The project itself was to put the WRX engine into the mini behind the front seats as a mid-engined car with the 5 Spd gearbox towards the rear. This means it’s no longer an AWD and I will be using it as a RWD. (2WD)
As the rear floor was going to be cut out I was required to do a torsion and beaming test to see what the original mini base specs where to ensure I meet the engineers requirements once complete.
Months of research meant that I knew what I needed to buy for this project to be a success. I also splashed out on some feel good parts too.
- Mazda MX5 hubs, suspension and subframe. Why? Because it is a RWD vehicle and would suit my project. The MX5 has a 4x100 stud pattern so it wouldn’t look too different to the mini’s 4 stud. The problem I had was that it is very hard to find small wheels. Everyone wants larger wheels these days.
- 2003 BMW mini panoramic sunroof. I just love sunroofs so why not..... the video below shows that I bought one that works. Ha- 15” wheels. Of course I had to see what they would look like.
- A torque sensing Limited Slip Diff. (LSD) For some additional traction. I think I will need it. 😂
- 3.9 Final Drive (FD) to help get a similar gearing with the 15” wheels
- WRX cloth seats. (2003) The WRX I bought had leather seats which I wasn’t a fan of.
- Some Haltech goodies. Elite 2500 ECU, IC7 dash, wideband, pins, connectors etc
- A pair of LED headlights with halo ring.


31/5/2020
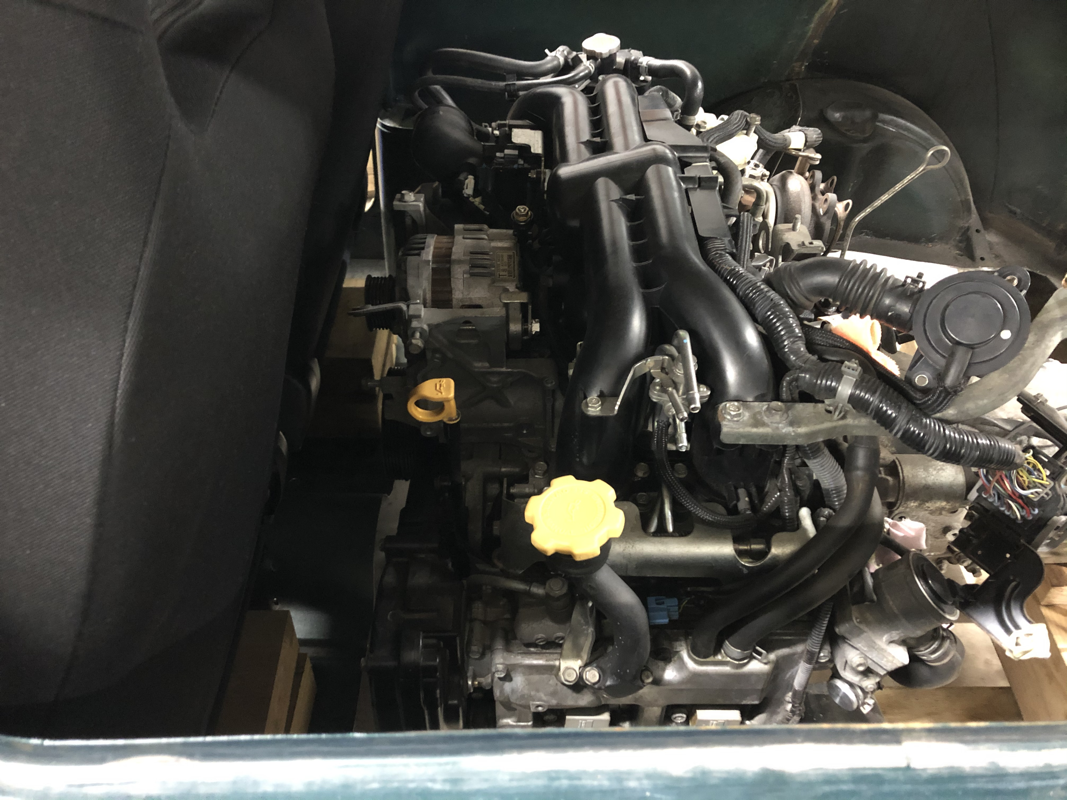
I had stripped a fair bit of the Rex so figured it was time the engine came out. Here’s a short video of it being removed. If you are considering getting a hoist for your garage I can highly recommend it. Best investment ever.
I had stripped a fair bit of the Rex so figured it was time the engine came out. Here’s a short video of it being removed. If you are considering getting a hoist for your garage I can highly recommend it. Best investment ever.
8/6/20
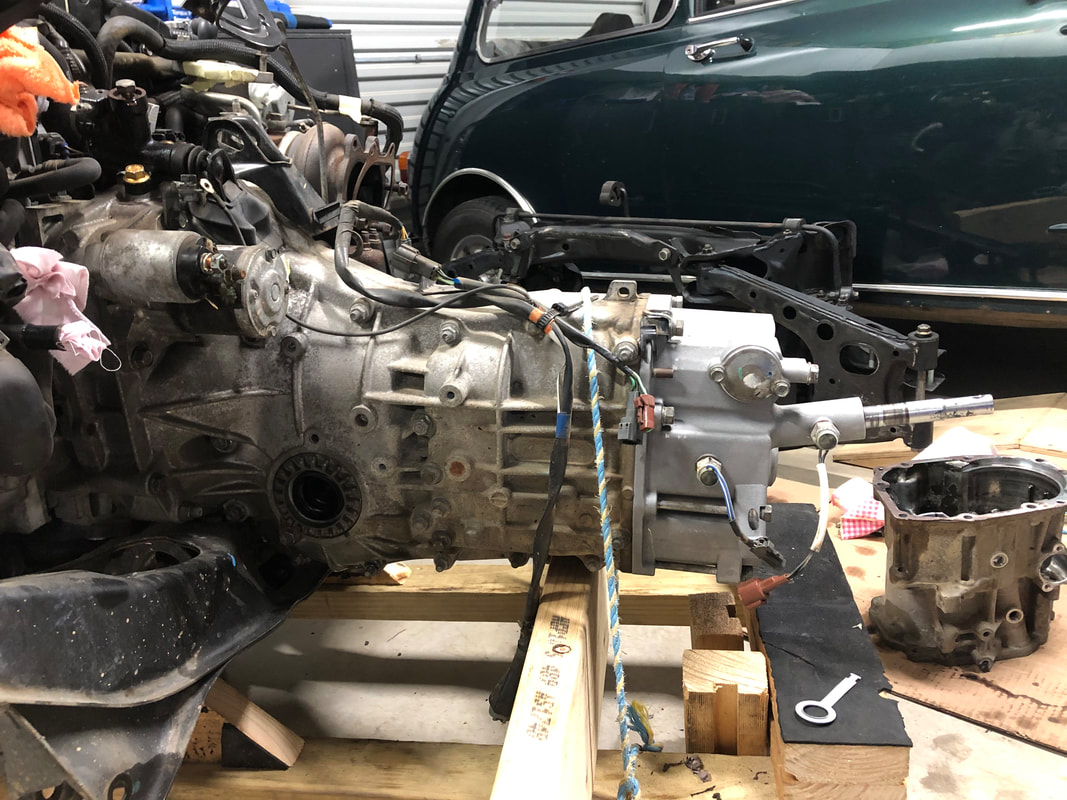
Seeing as I was not using the AWD, I bought a Subanose from Subarugears in WA. They do some great stuff for customers doing WRX engines into classic Beetles and Kombis. This is also where I bought the LSD and locking nut to convert it to 2WD.
The diff in the gearbox for the RWD gets removed for the subanose which also shortens the gearbox enough for it to fit into the tight space I have.

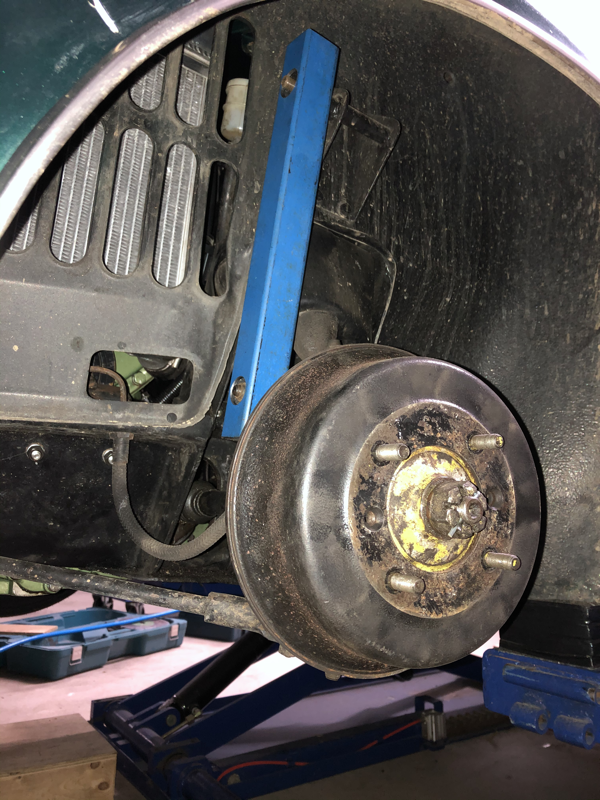
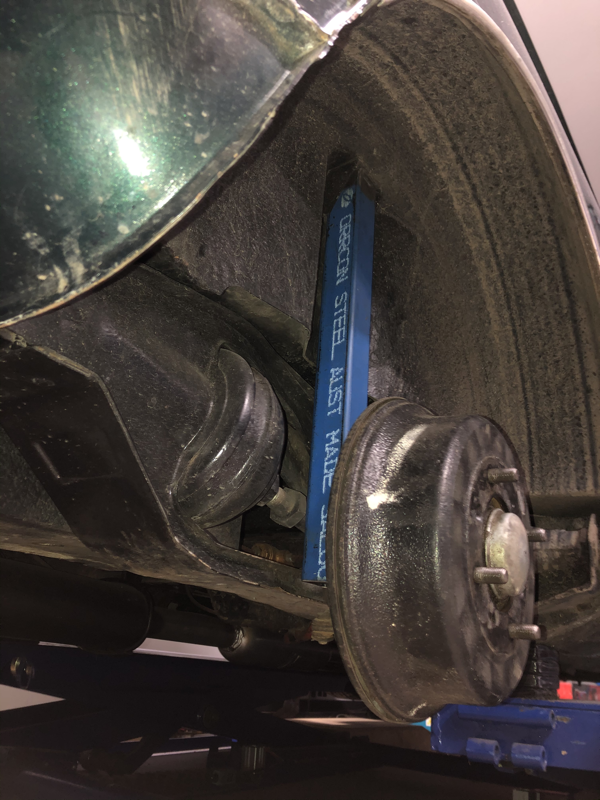
To complete the torsion test I had to lock the suspension in place so there is no movement at all. The mini this was quite simple to do this. I simply replaced the shock absorbers with some square tube. The only suspension it had was in the tyres.
12/7/20
The torsion and beaming tests were done and the result was surprising even to the engineer. Even the mini has a lot of sheet metal and is just spot welded it was stiffer than a Cobra Kit kit with a full chassis.
This meant I have to make sure the build is solid.
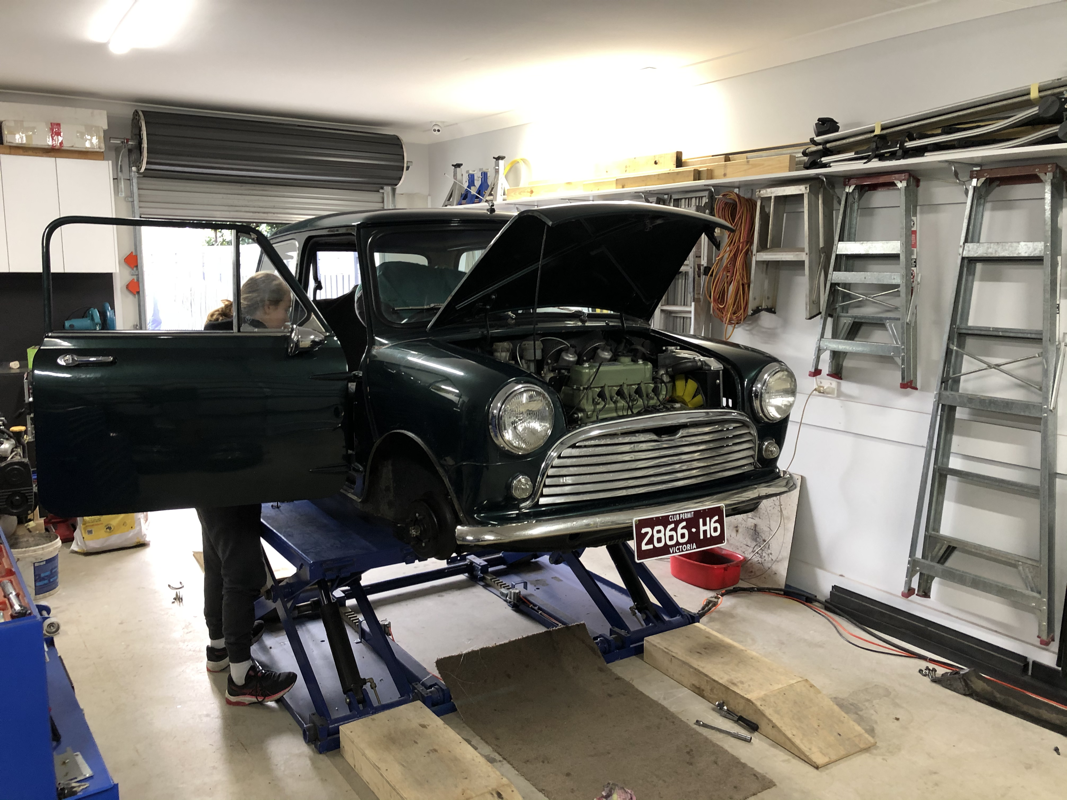
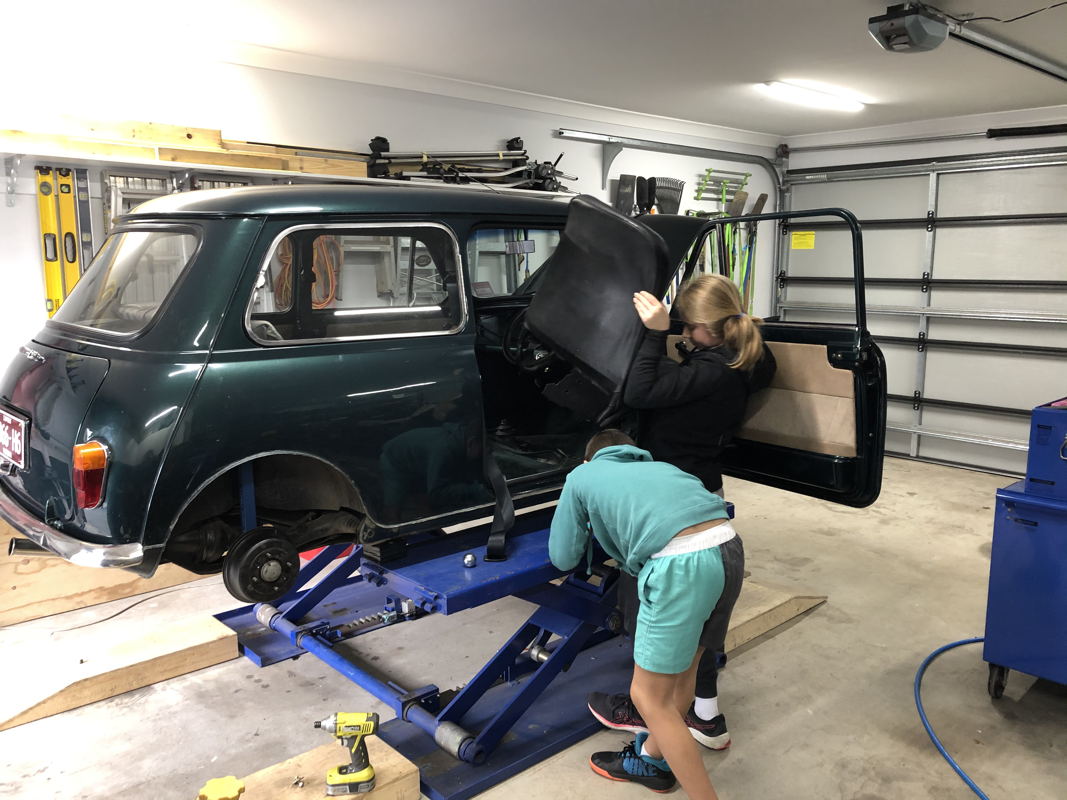
Anyway, stripping the mini was the priority. The best part about the mini is that there’s not much to strip. 😀👍 with the help of the kids the body was stripped within a few hours. The engine followed the next day.
The torsion and beaming tests were done and the result was surprising even to the engineer. Even the mini has a lot of sheet metal and is just spot welded it was stiffer than a Cobra Kit kit with a full chassis.
This meant I have to make sure the build is solid.
Anyway, stripping the mini was the priority. The best part about the mini is that there’s not much to strip. 😀👍 with the help of the kids the body was stripped within a few hours. The engine followed the next day.


16/7/20
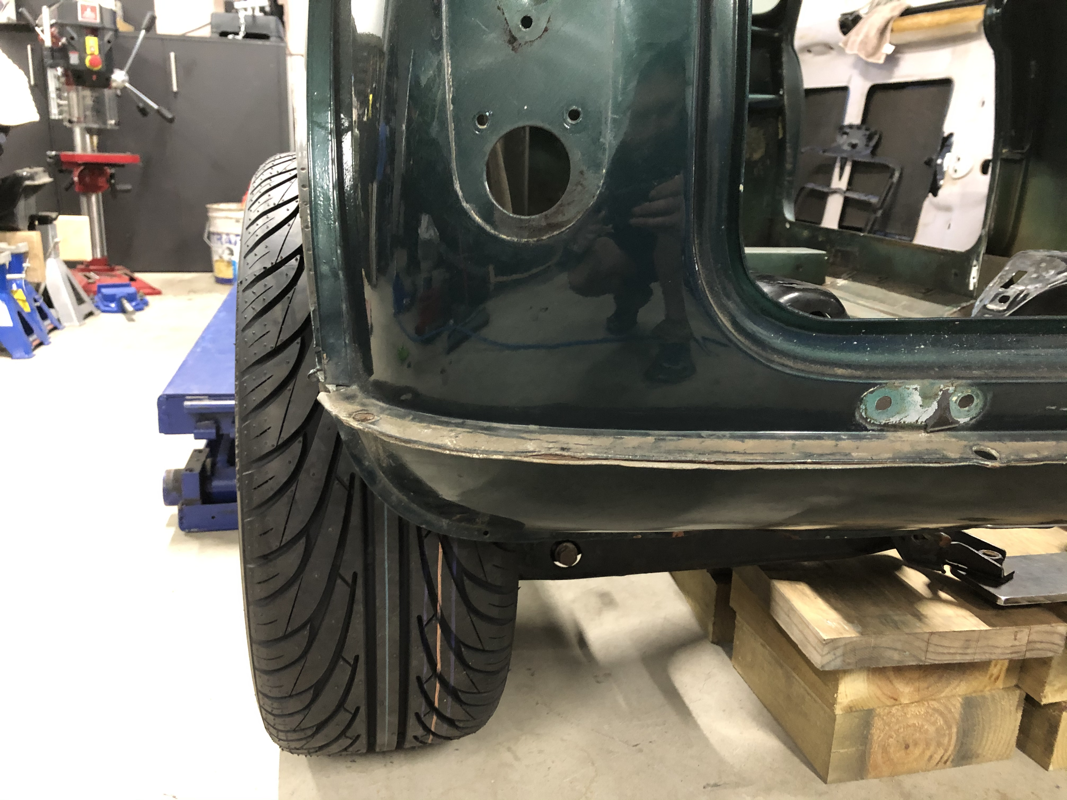
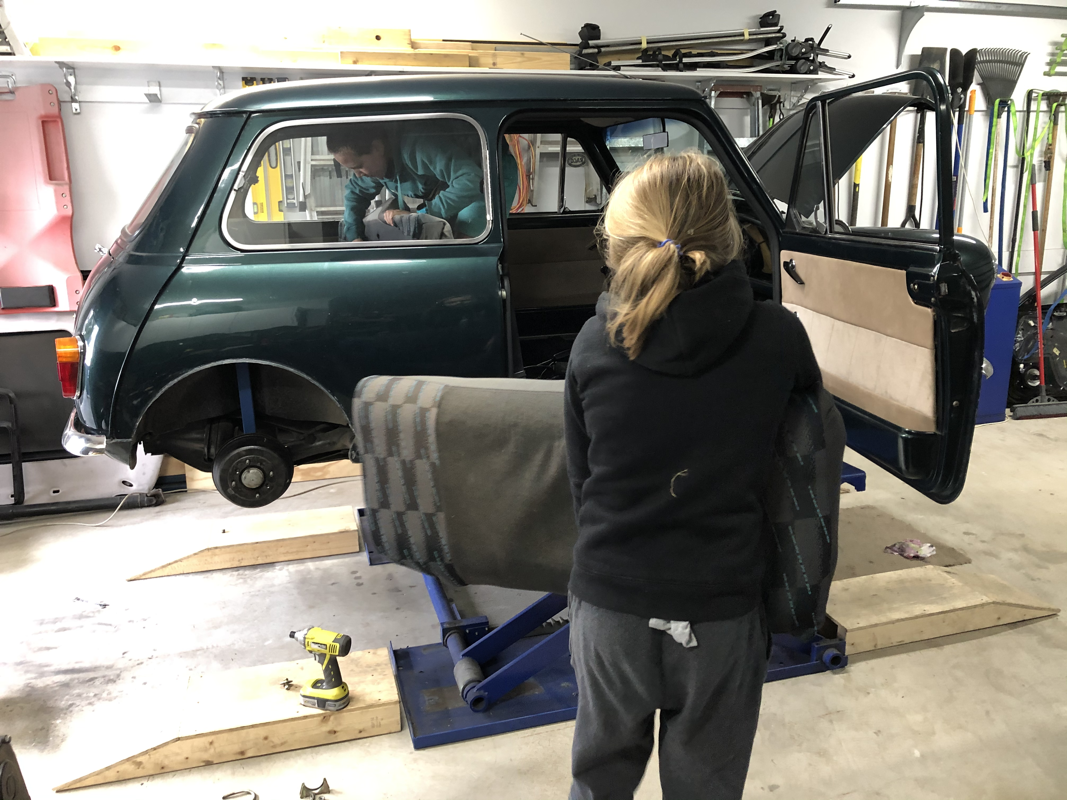
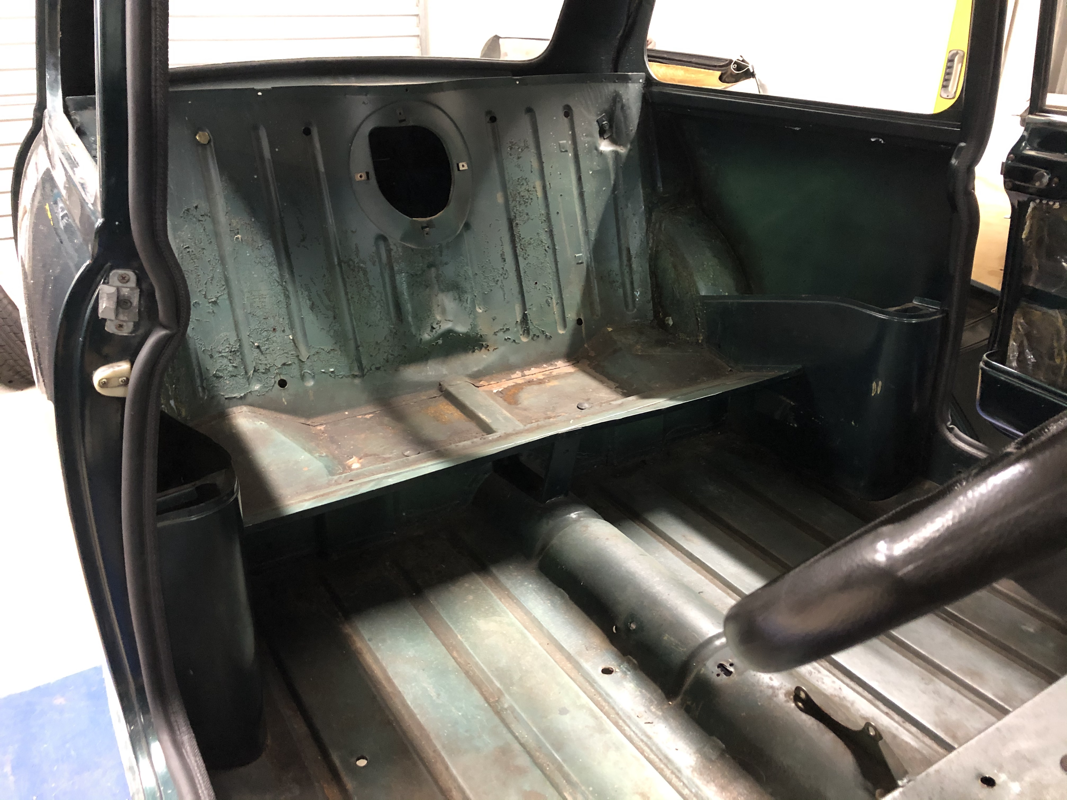
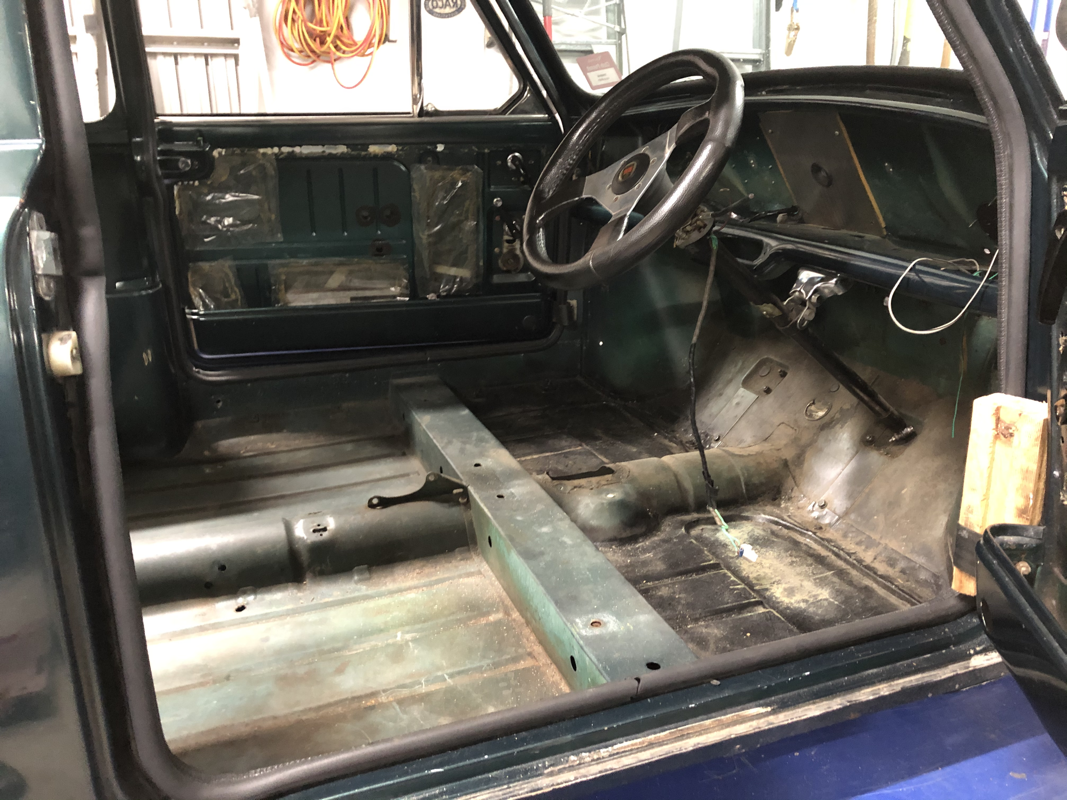
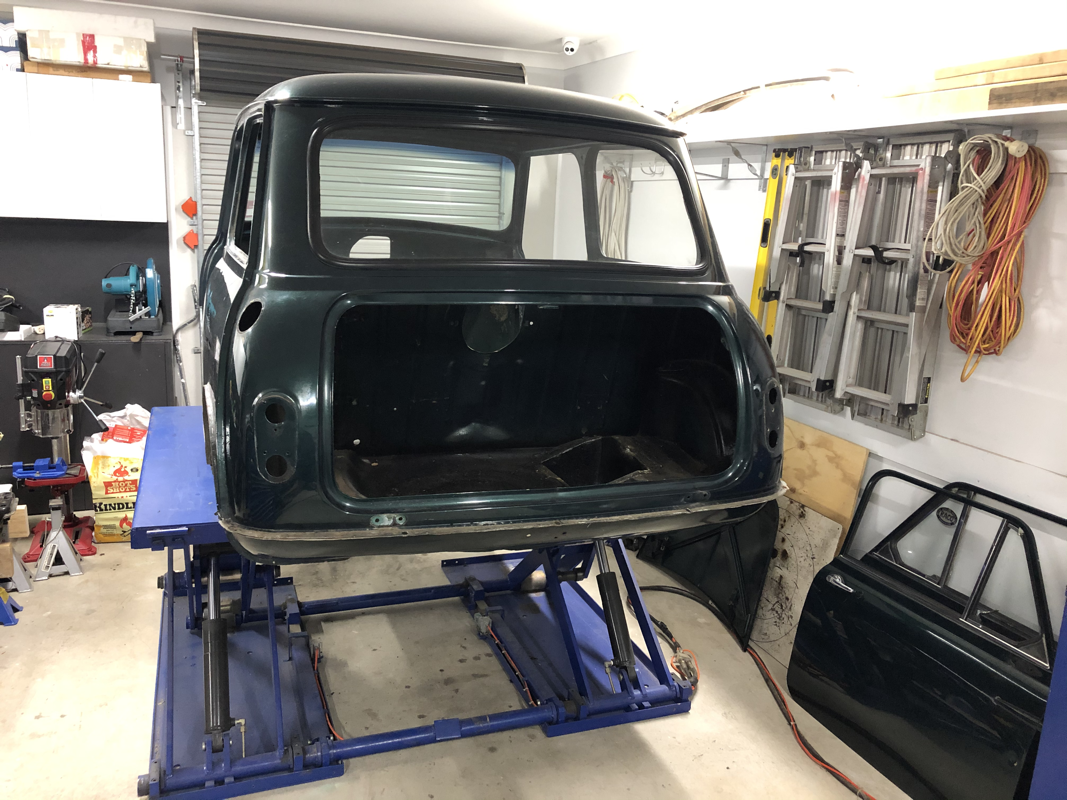
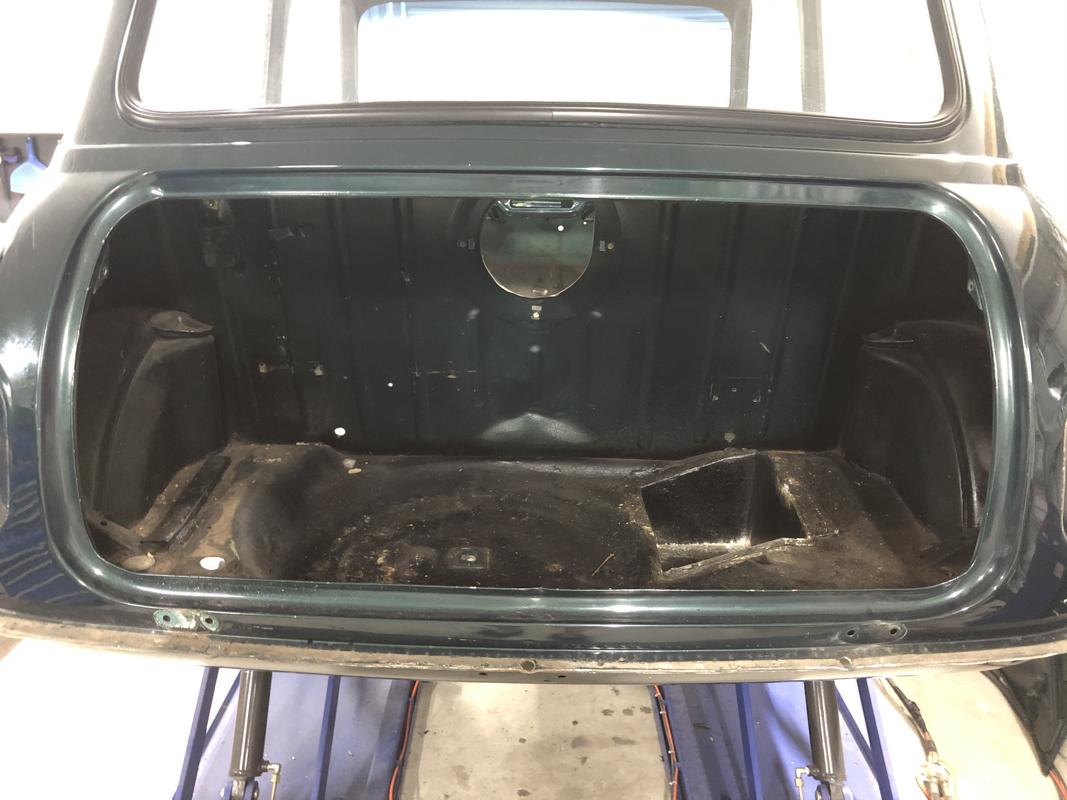
Body was completely stripped of all subframes, fuel lines, grommets etc. But before the doors came off I thought I’d have a look at the car with the wheels under the body.
Body was completely stripped of all subframes, fuel lines, grommets etc. But before the doors came off I thought I’d have a look at the car with the wheels under the body.


18/7/20
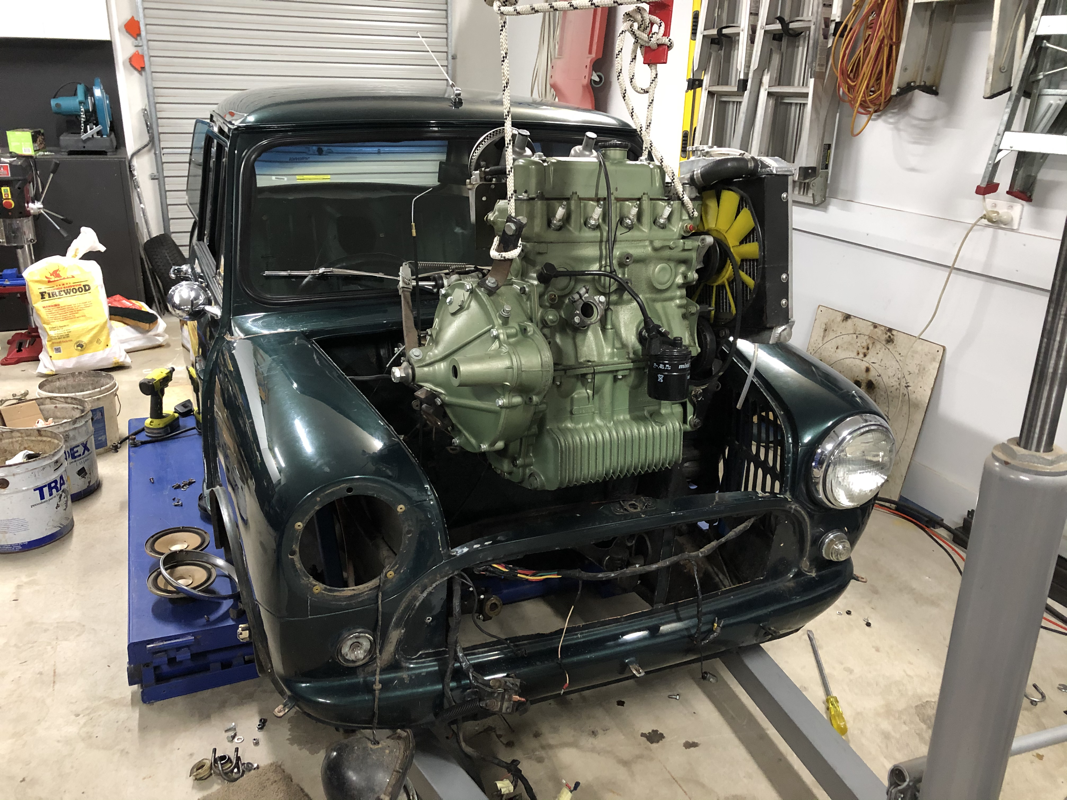
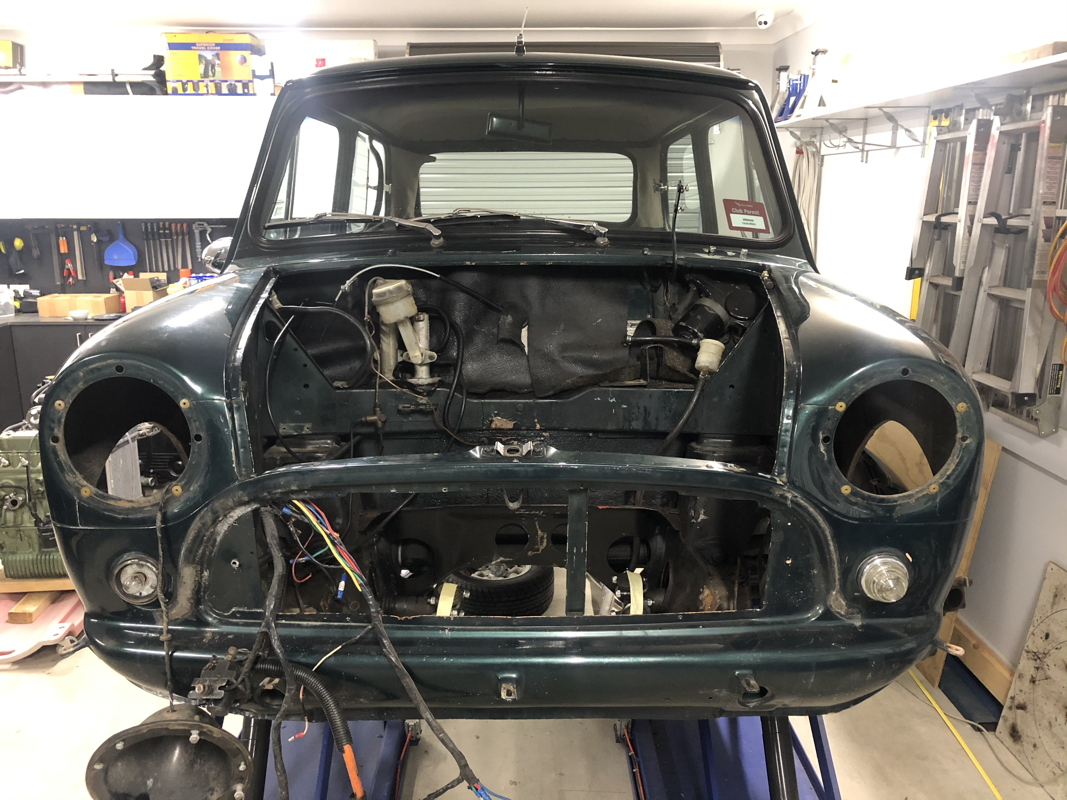
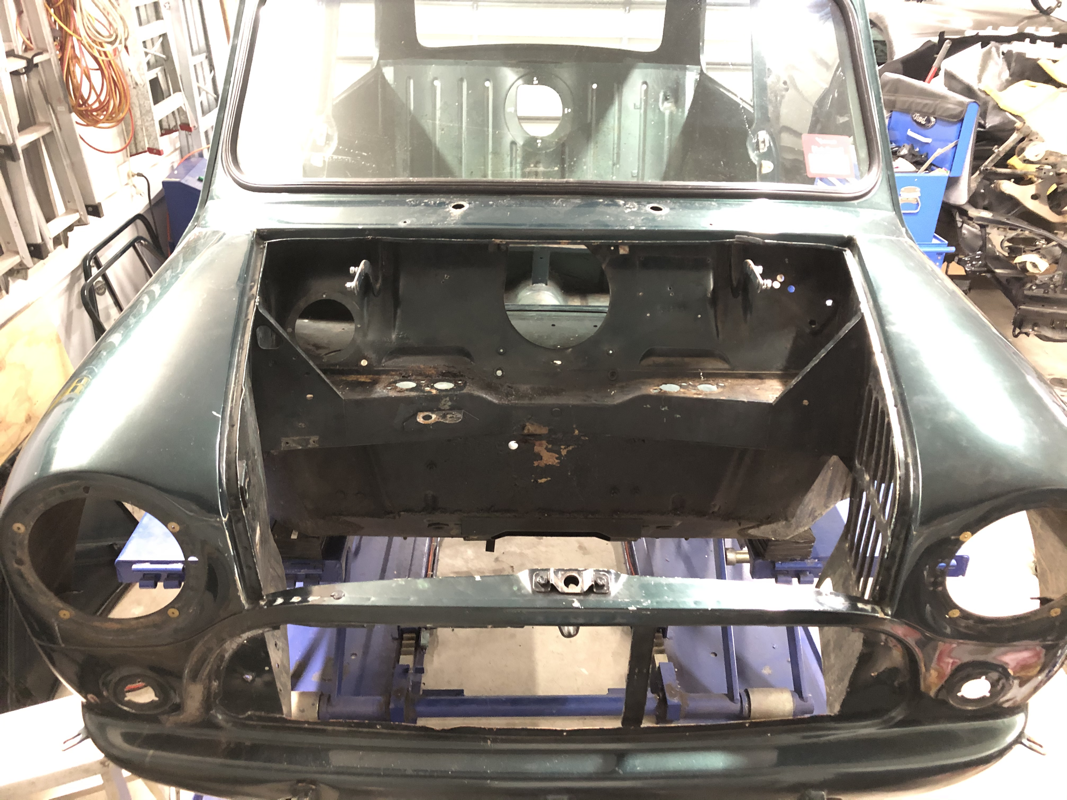
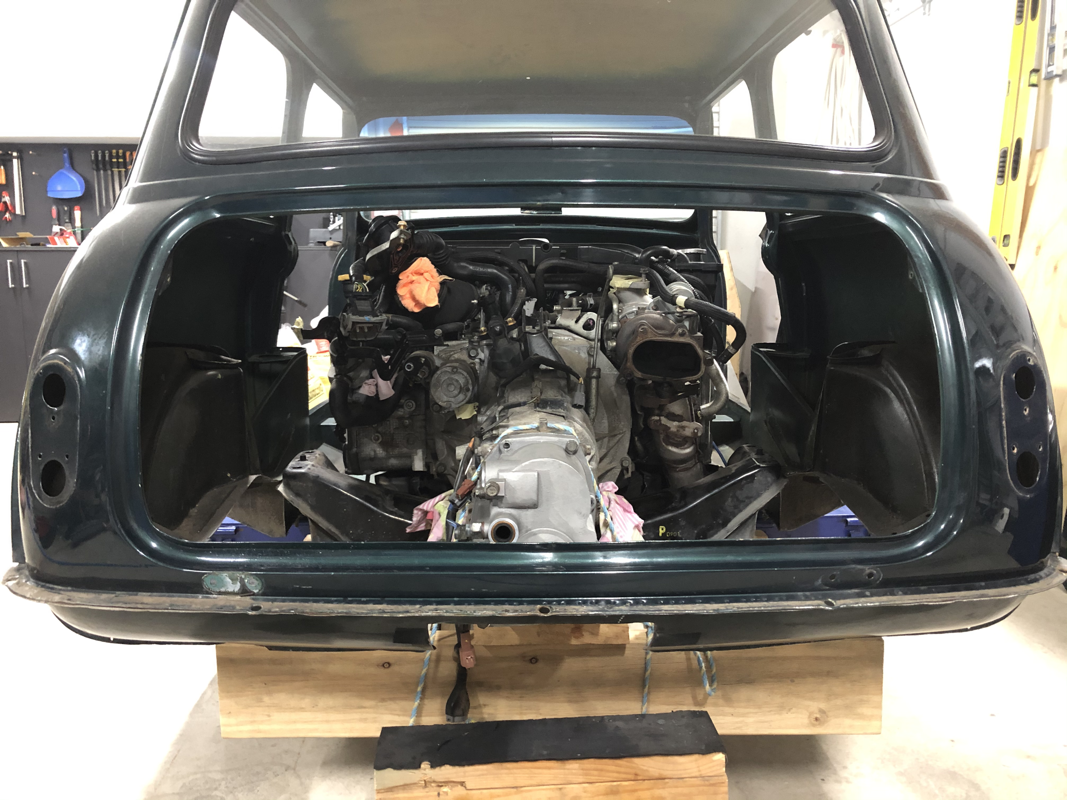
For those following the build on Facebook (Dutchy’s Mini) I didn’t to much away in how the engine was going to fit. A few photos got people thinking “how is that going to fit?” I thought I would throw in a curve ball to keep them on their toes. 🤣
As you can see below the boxer engine is wide and was never going to fit in the front and meet the engineering requirements. The track width would be too wide and steering would be a real problem. Not to mention the front wheels would have to go back a long way to meet the driveshaft location from the gearbox which just wouldn’t work.

19/7/20
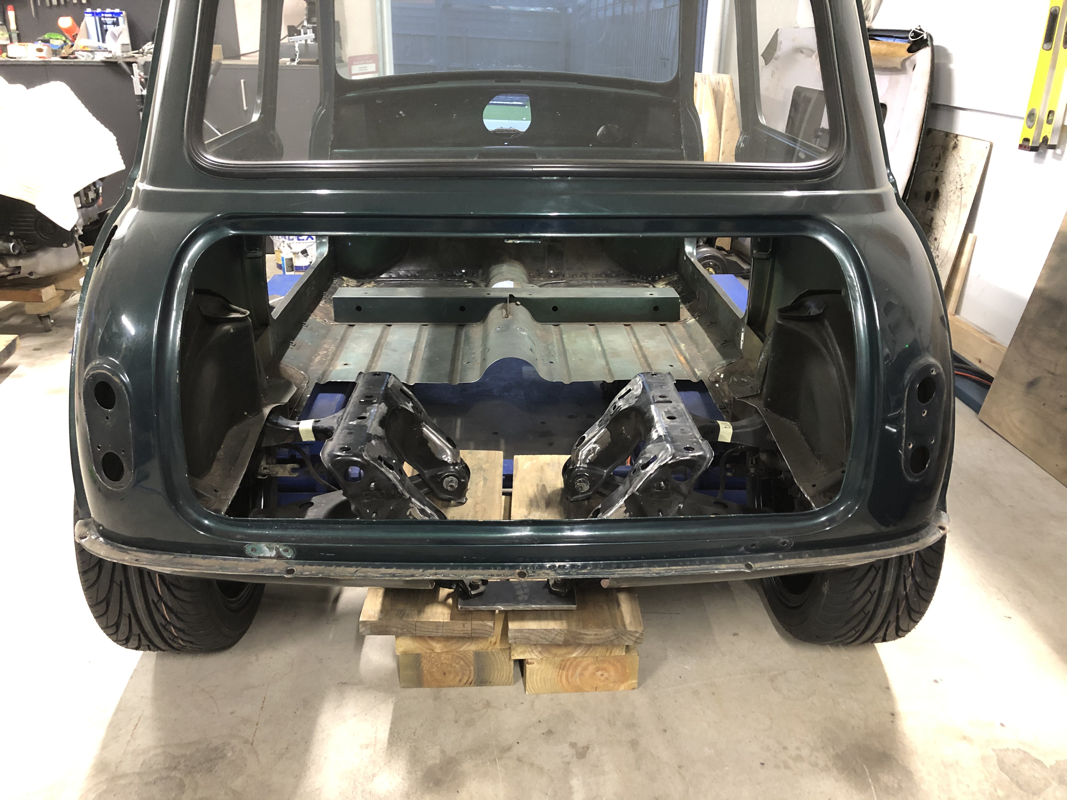
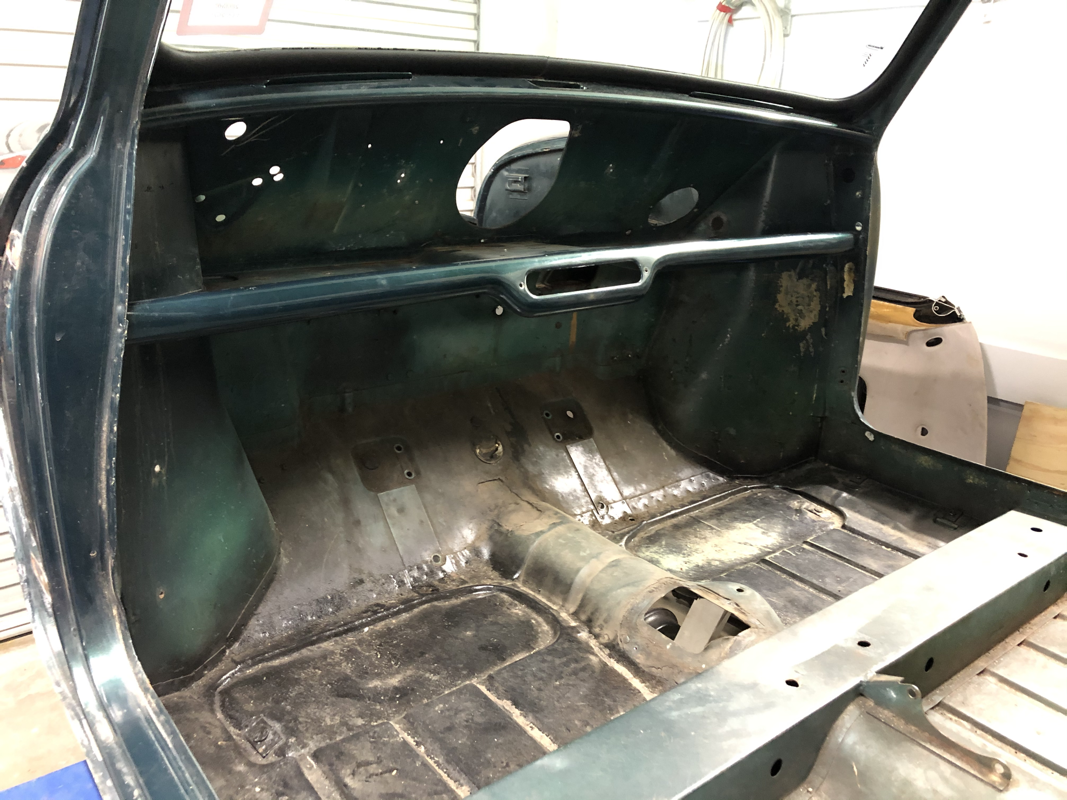
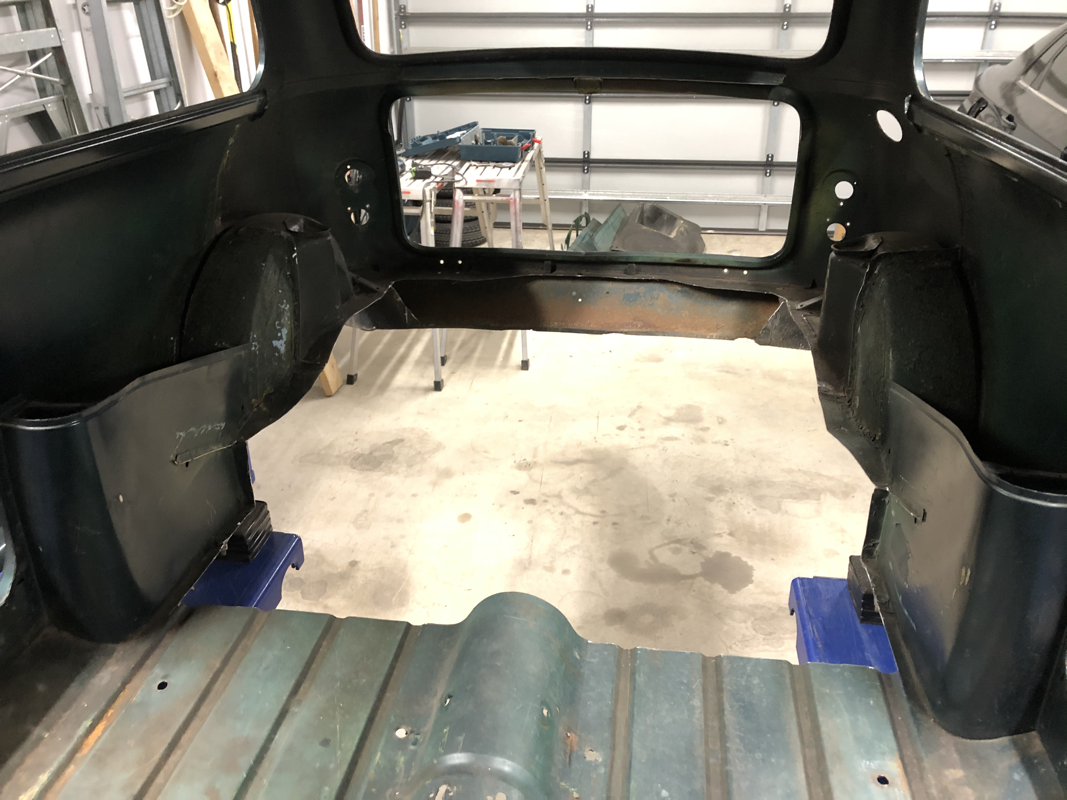
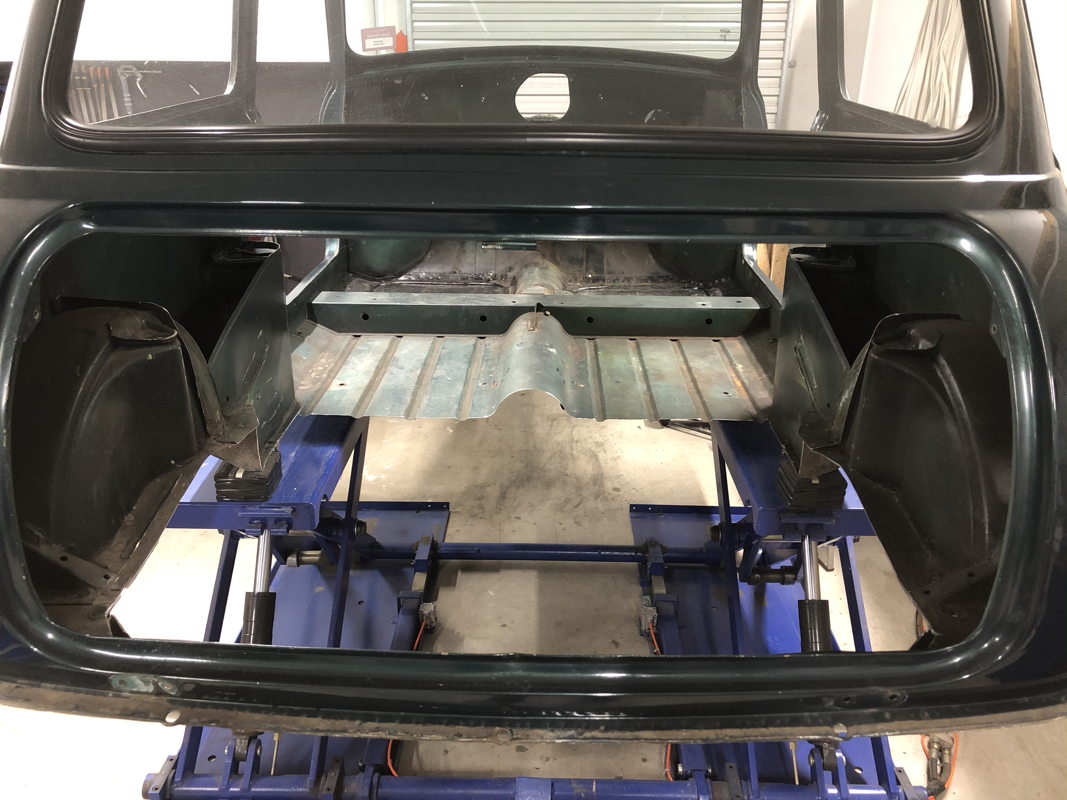
It was to make this project real. Out came the angle grinder and away I went. The rear seat and boot floor had to go. I kept the wheel arches in for some stability until I build the chassis and engine subframe. These will have to eventually come out to cater for the 15” wheels.
It was to make this project real. Out came the angle grinder and away I went. The rear seat and boot floor had to go. I kept the wheel arches in for some stability until I build the chassis and engine subframe. These will have to eventually come out to cater for the 15” wheels.
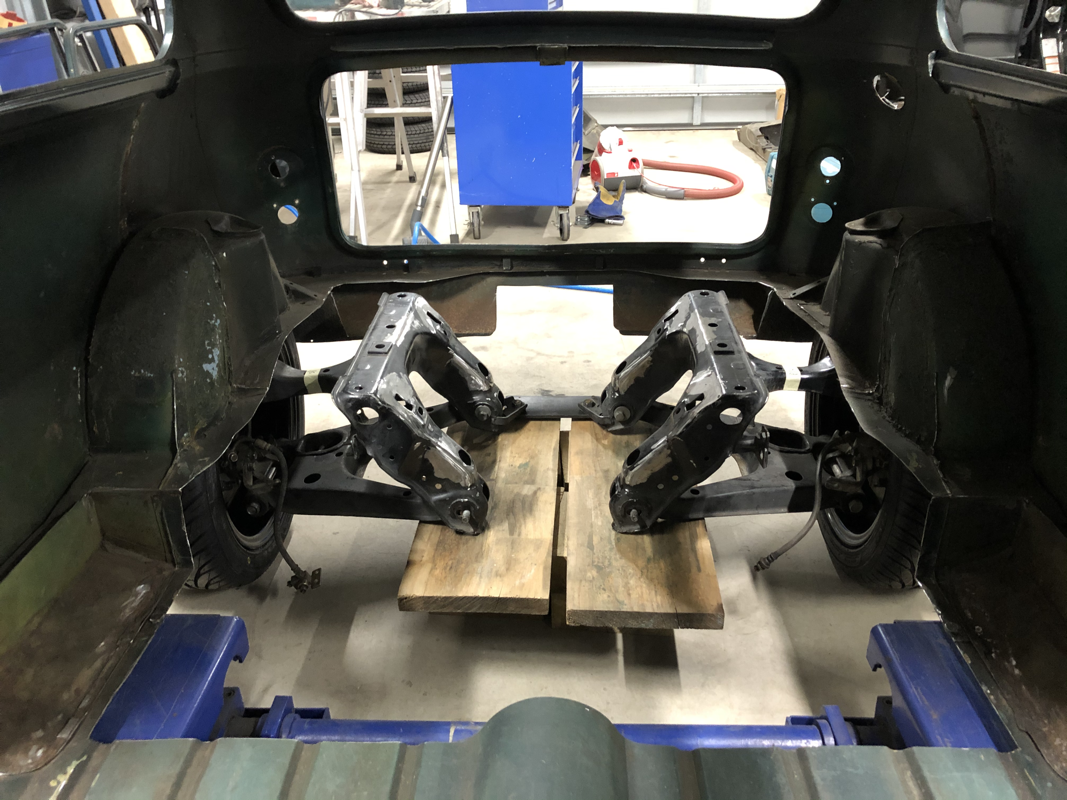
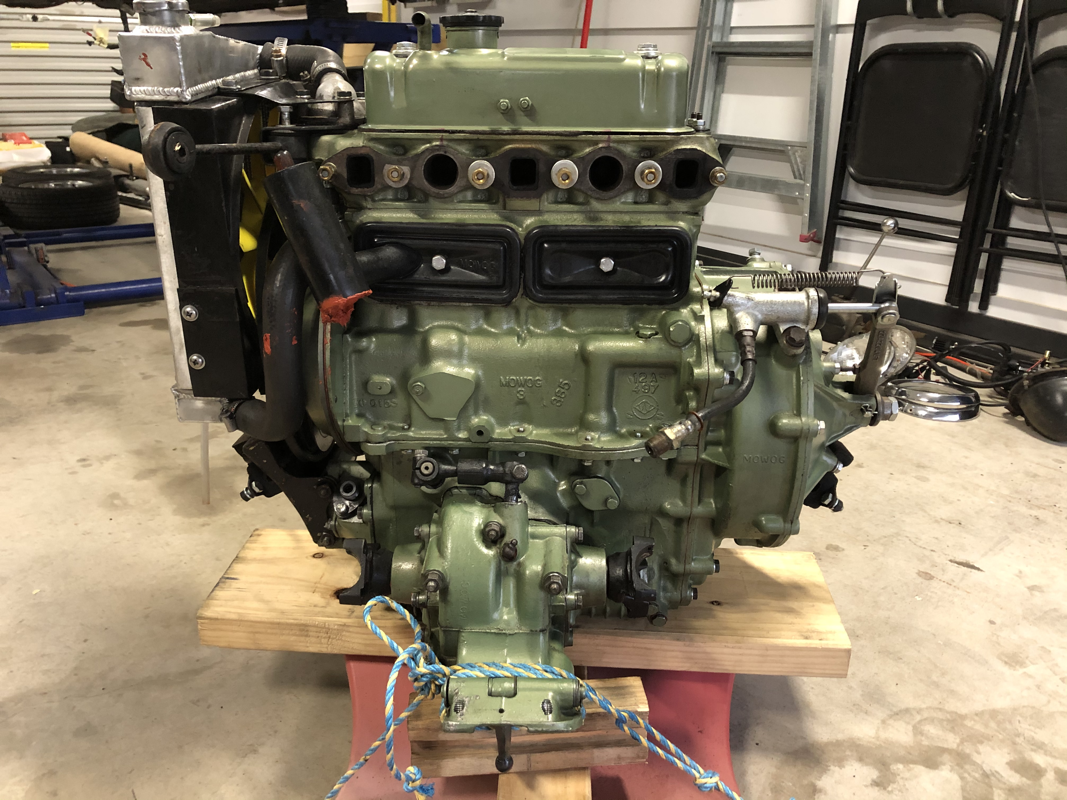
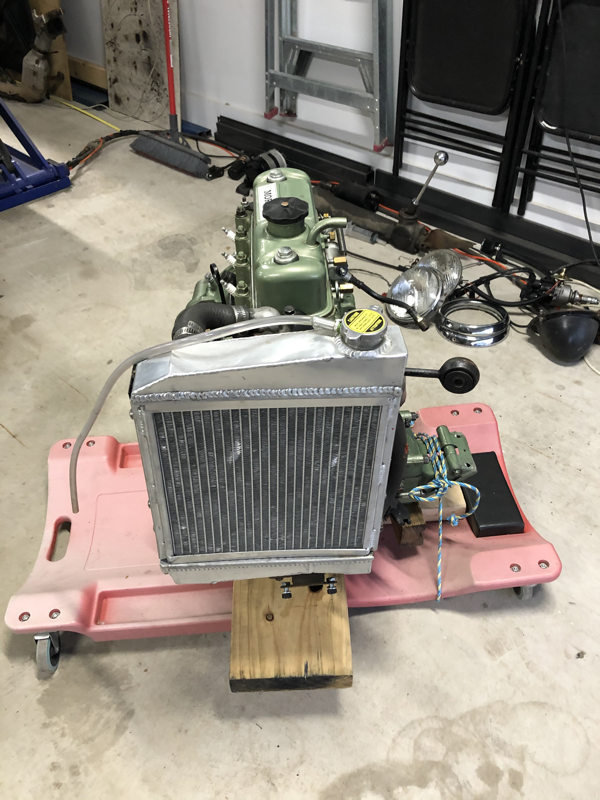
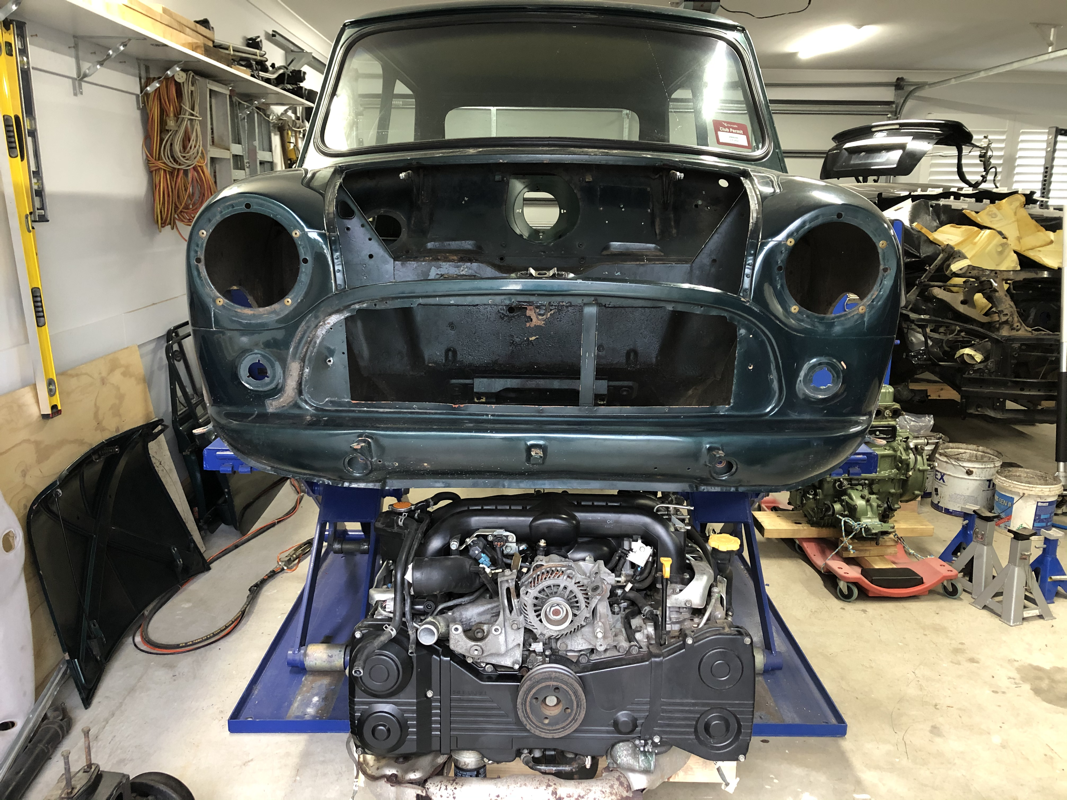
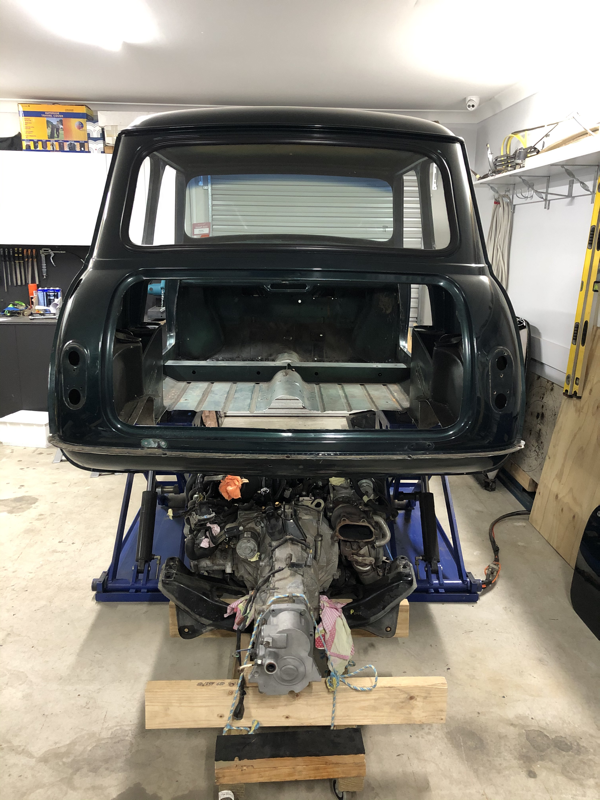
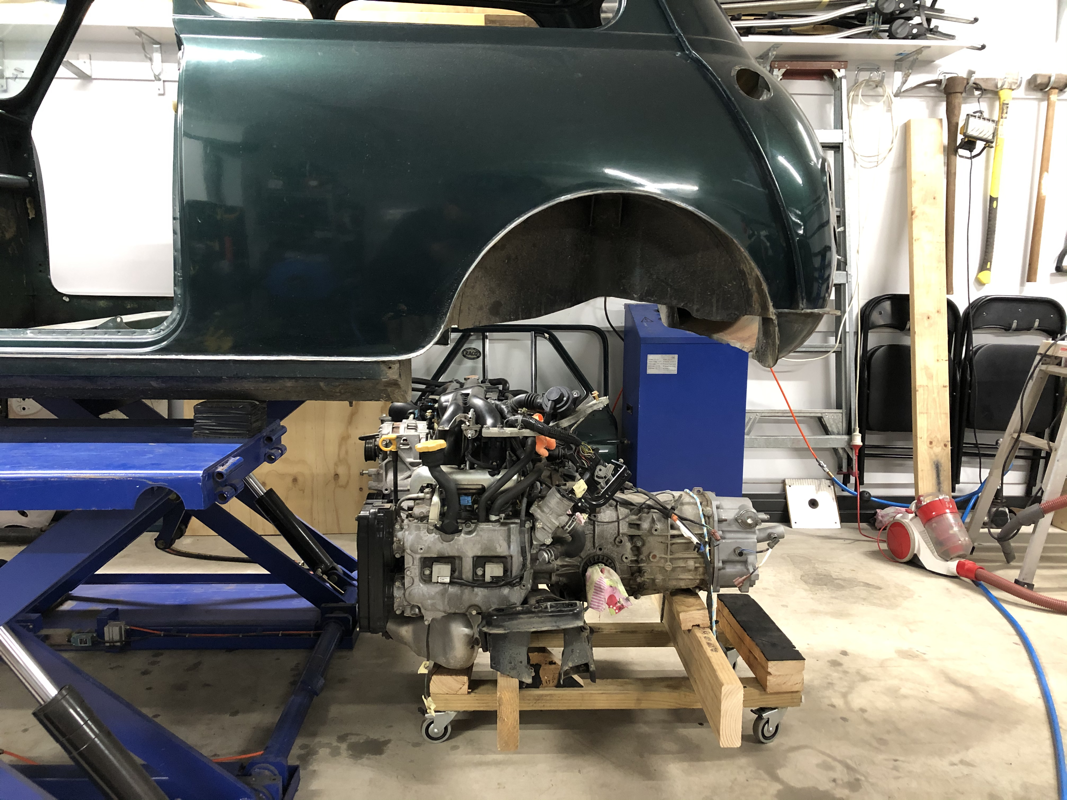
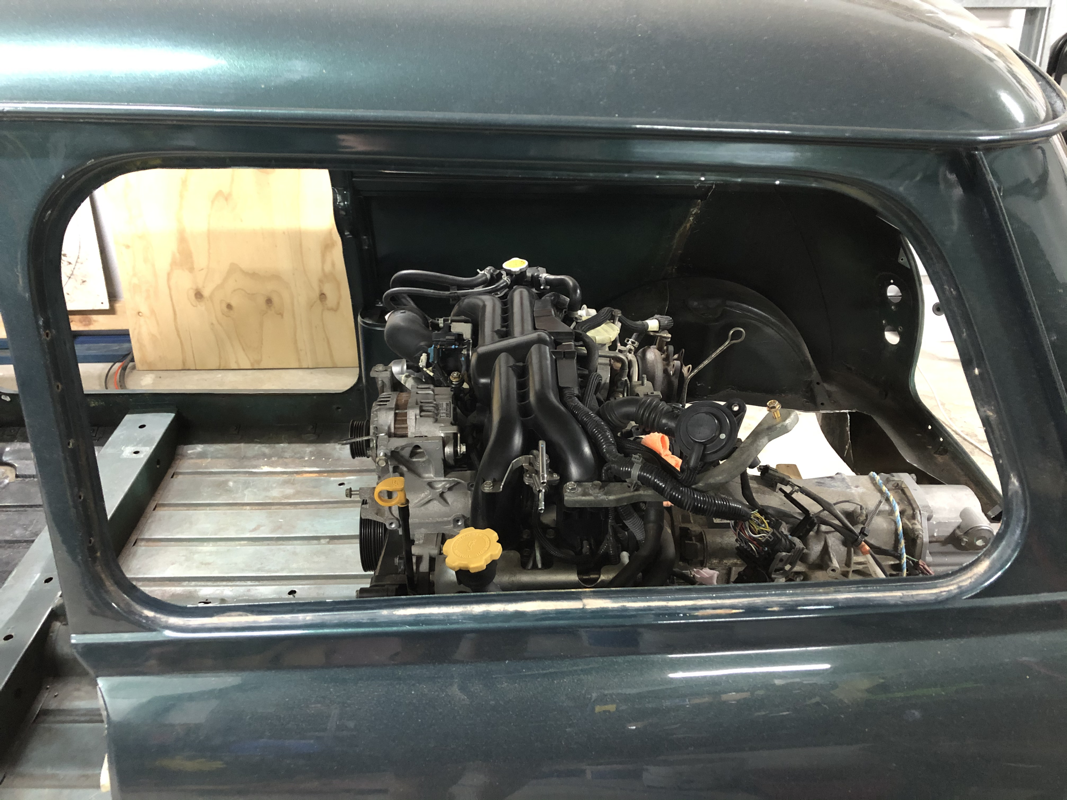
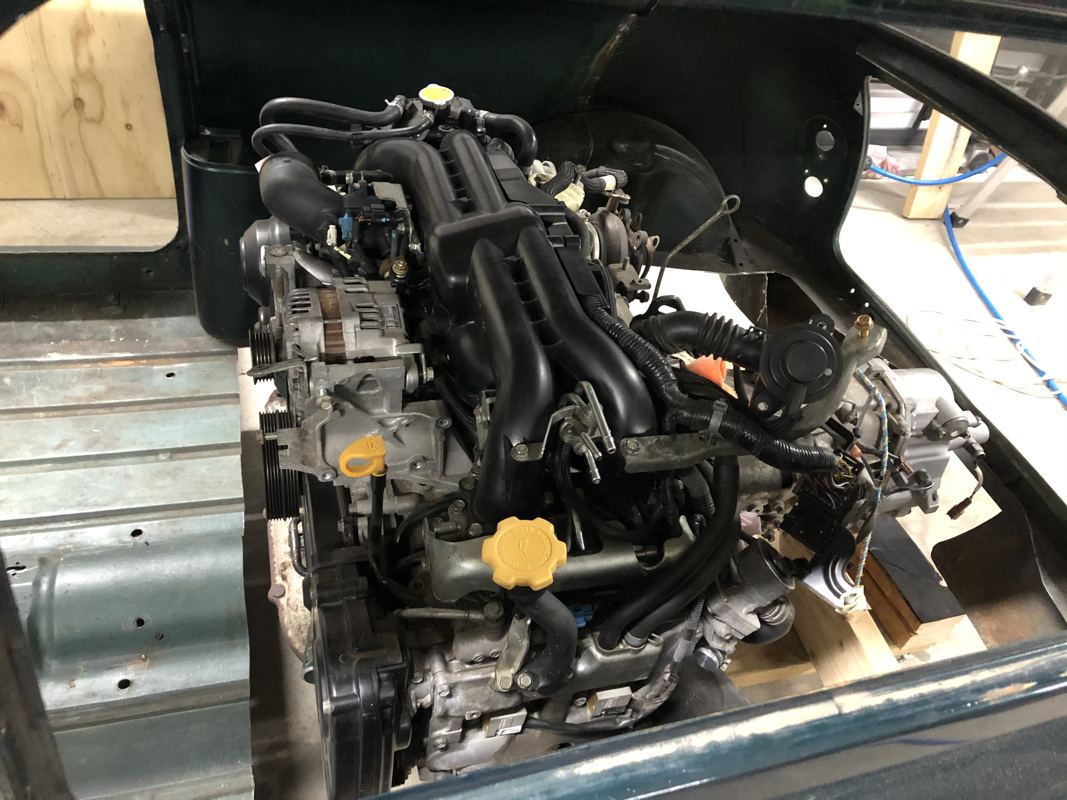
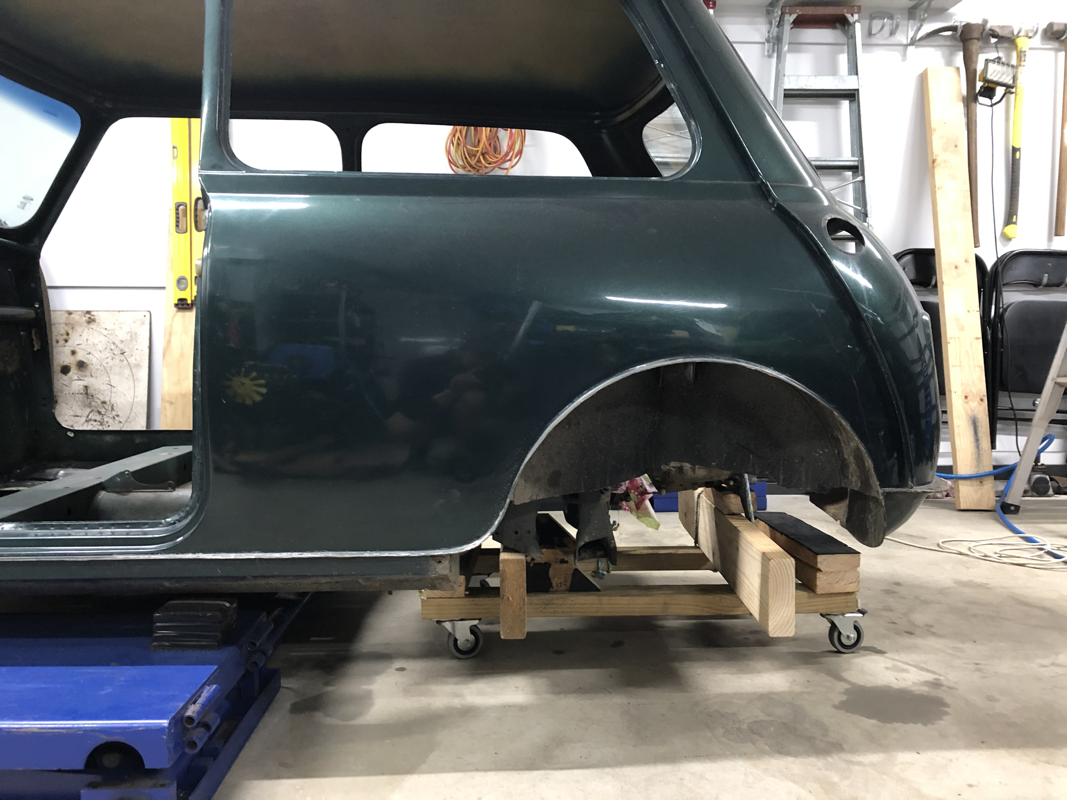
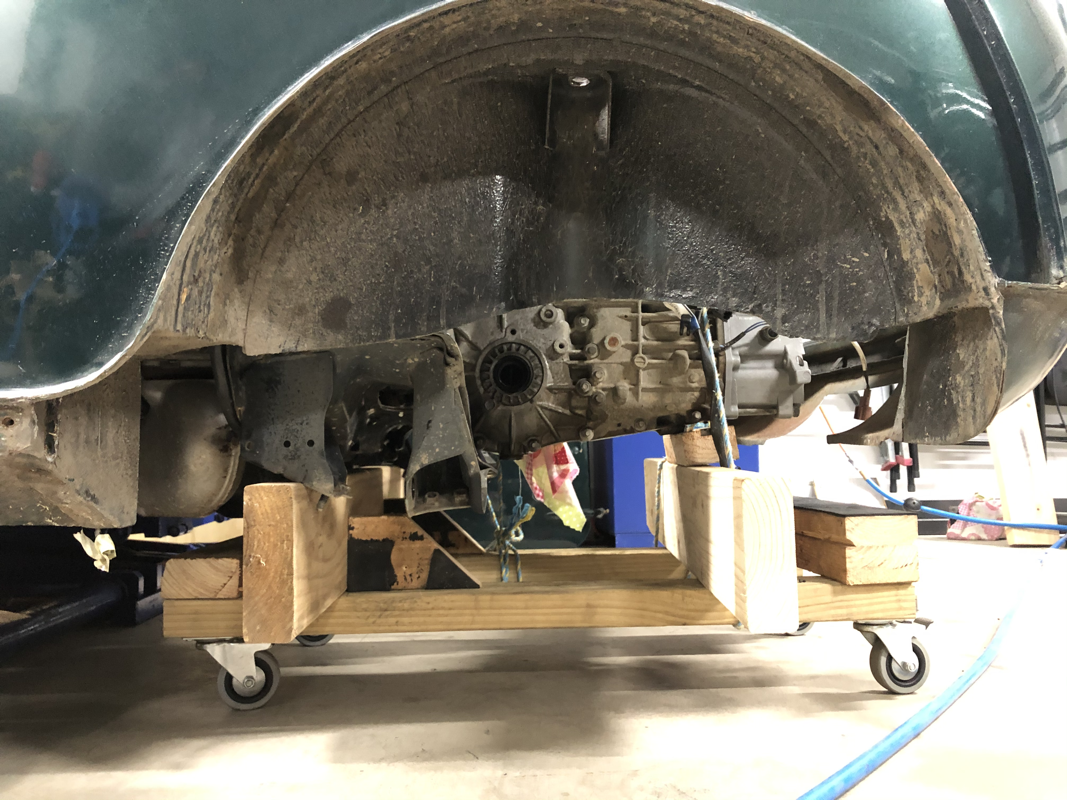
Now was the moment of truth. Would all the research on the size of the engine vs the mini work out? So much measuring went into this. Every mm was going to count.
The biggest smile hit my face when I saw how it was all going to fit, even have some room to move. This was the moment I knew the project will be awesome once done!


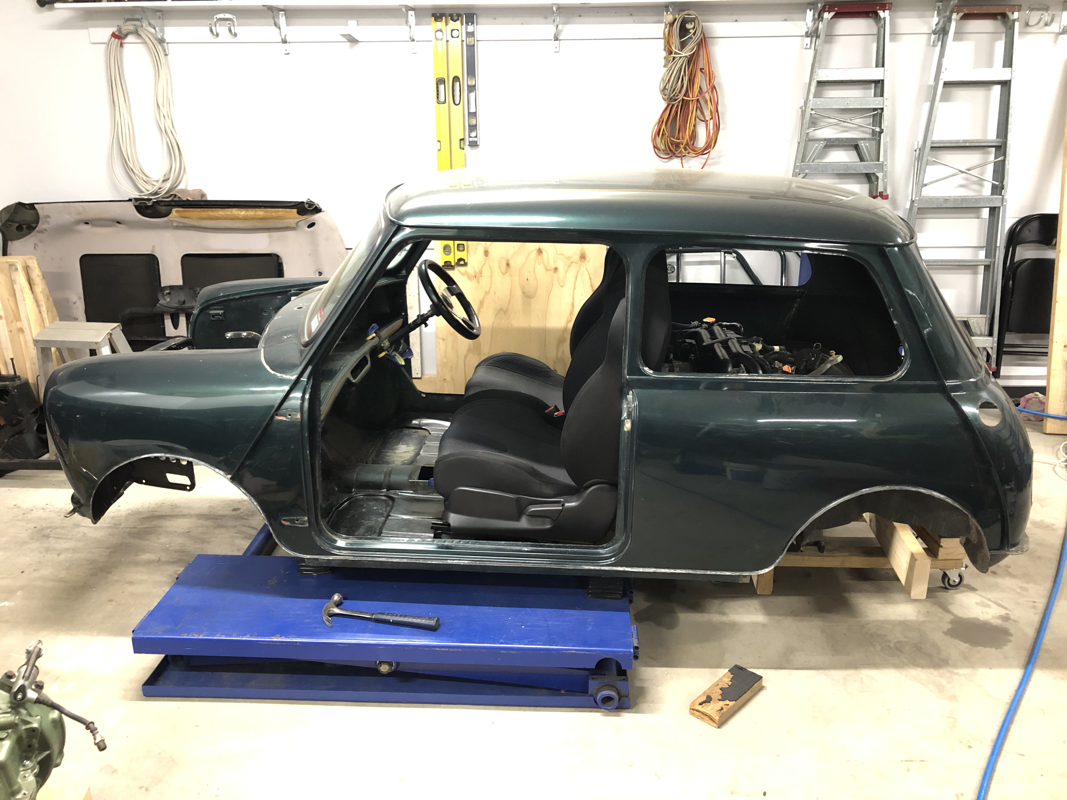
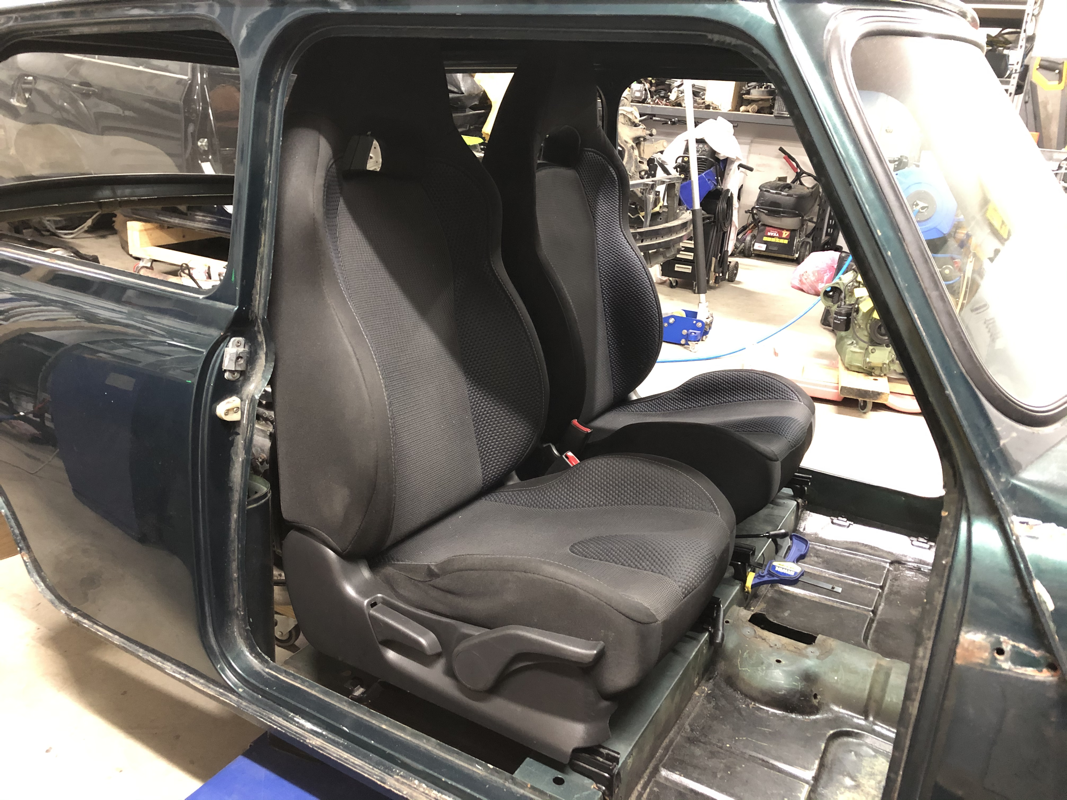
Just to add to the excitement I put in the seats and steering wheel for a look into the future. While the seats were close they were just sitting in there and can slide forward. Of course I sat in them to get a feel. It still had the same seating position as my previous VTEC mini which was great. This was another tick for me.

25/7/20
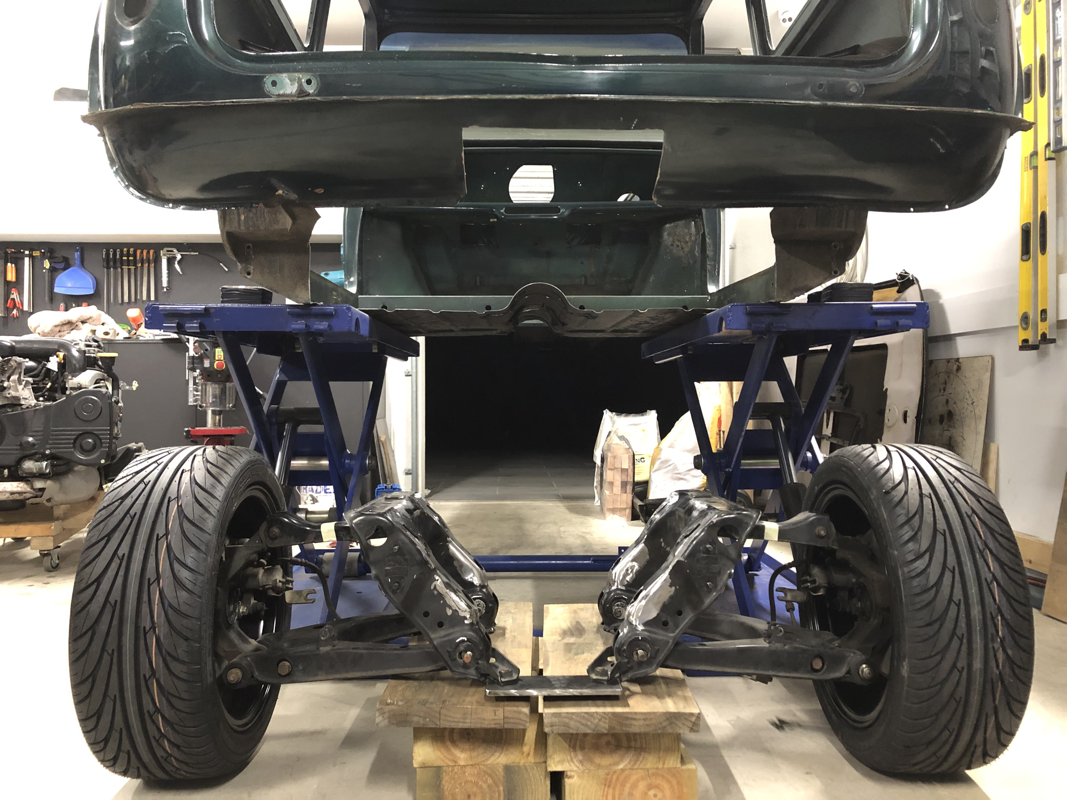
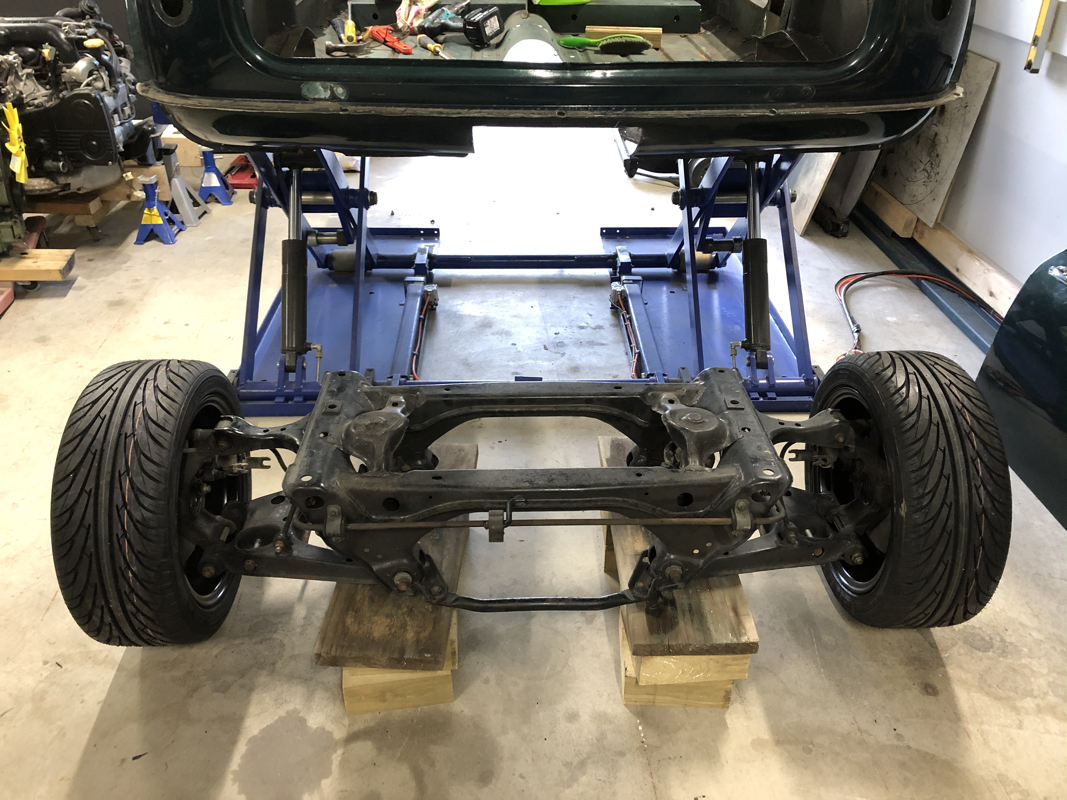
The MX5 rear subframe is going to be a great base to work from. I bought it complete with upper and lower control arms, hubs, brakes, anti-roll bar. Now this was never going to fit due to the mini having a narrower track width so after some considerable measuring and calculations I worked out it will need 230mm removed from the centre. Actually I will remove all of the centre and rebuild that part to suit the engine and transmission mounting. The outside will remain the same for the control arms to mount too. Out came the 9” grinder.
The MX5 rear subframe is going to be a great base to work from. I bought it complete with upper and lower control arms, hubs, brakes, anti-roll bar. Now this was never going to fit due to the mini having a narrower track width so after some considerable measuring and calculations I worked out it will need 230mm removed from the centre. Actually I will remove all of the centre and rebuild that part to suit the engine and transmission mounting. The outside will remain the same for the control arms to mount too. Out came the 9” grinder.

26/7/20
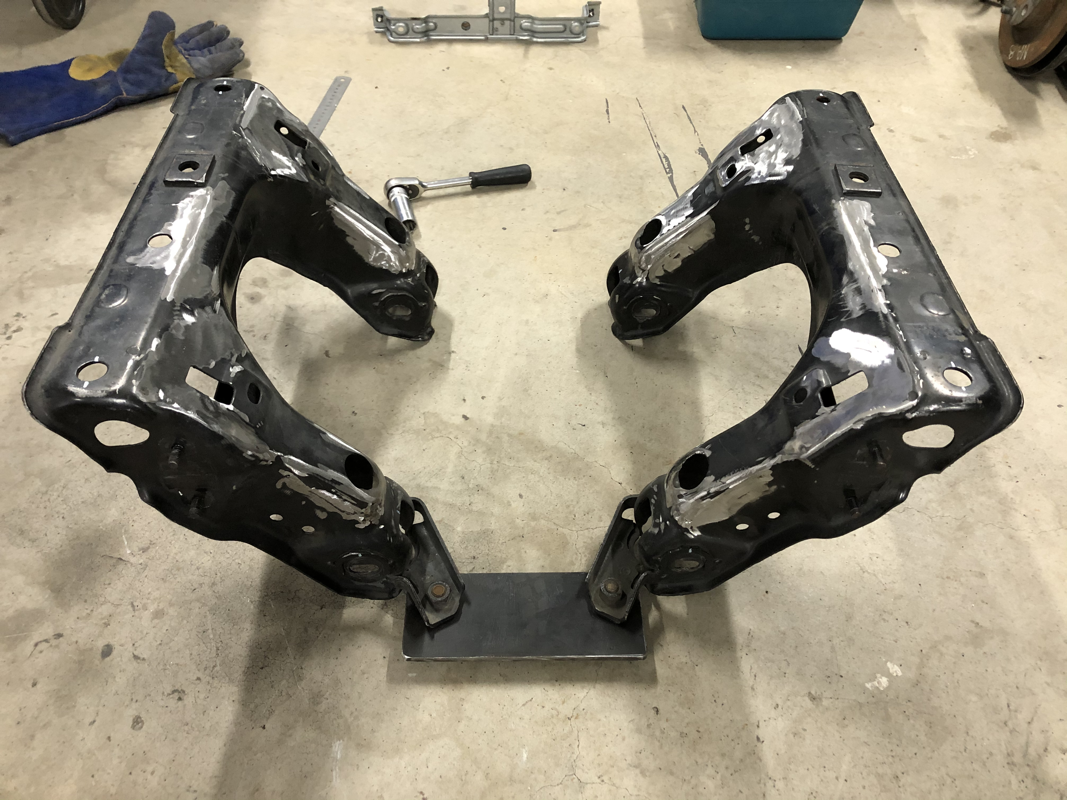
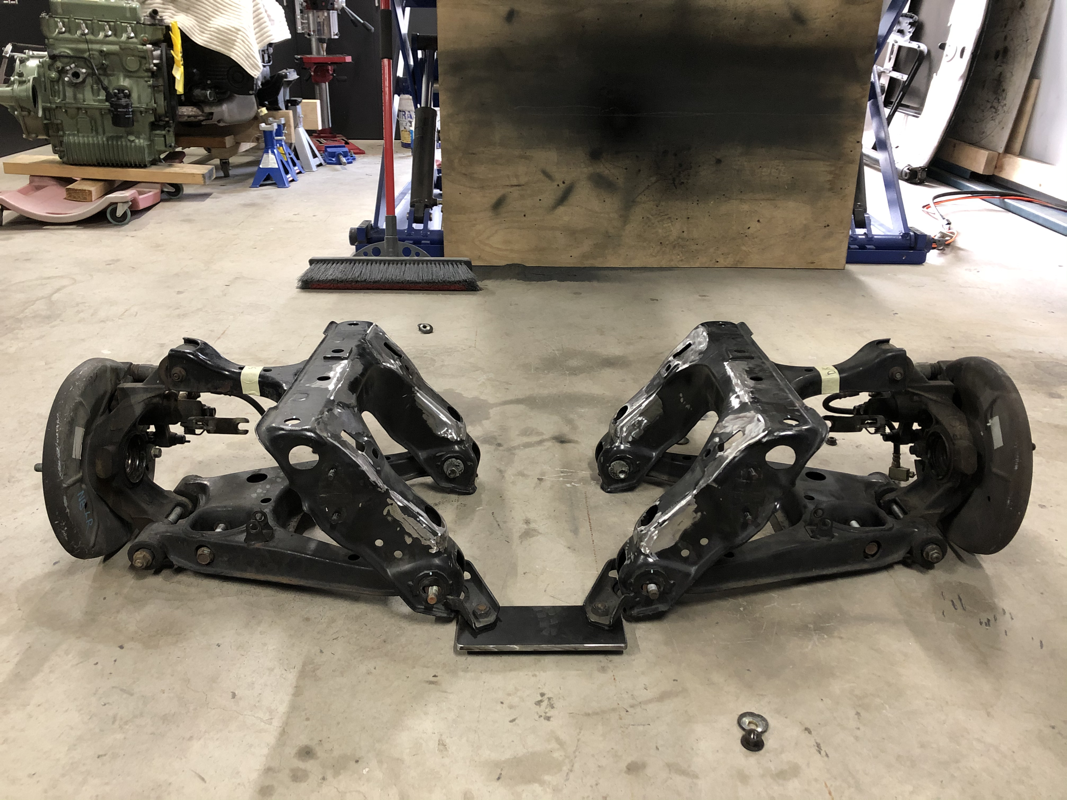
The MX5 subframe was cut up and the extra metal removed. I made a plate with 2 holes 146mm apart and bolted it where the cross brace would go. This measurement meant I had reduced the overall width by 230mm. Below are the photos. I even threw in the WRX rear shock absorbers just to see where they would mount and what angle they would sit at. I will get different coil overs as the Rex ones are no good for this project.
After lining it all up I thought the hub width could be slightly better. With the 25mm positive offset on these wheels I thought I can increase the hub width to cater for 40mm offset (an extra 30mm overall) and then when I fit the 25mm offset wheels they would sit about 60mm outside the quarter panels. This would allow me to fit some nice wide but not to wide arches in the future.
The the plate was re made with holes 176mm apart so in the end it was only 200mm narrower than the original MX5 frame. Every mm is going to count here.